|
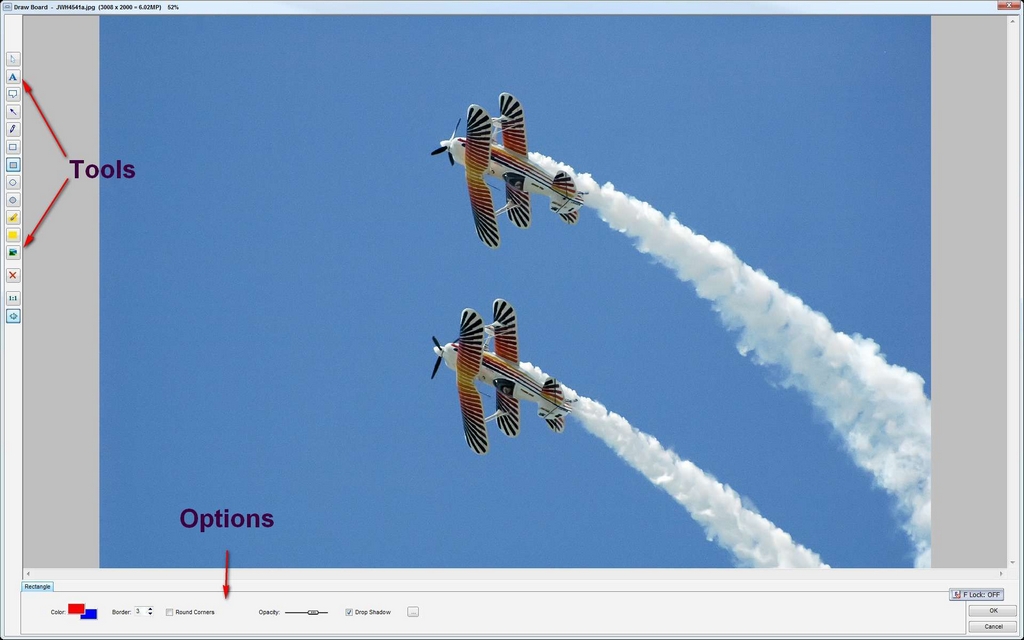
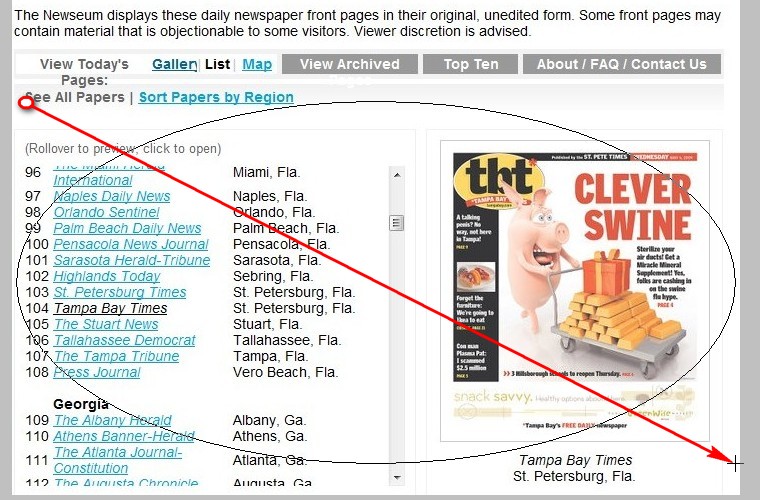
The Draw Board has many Tools located along its left side, jump to Tool Descriptions and Video.
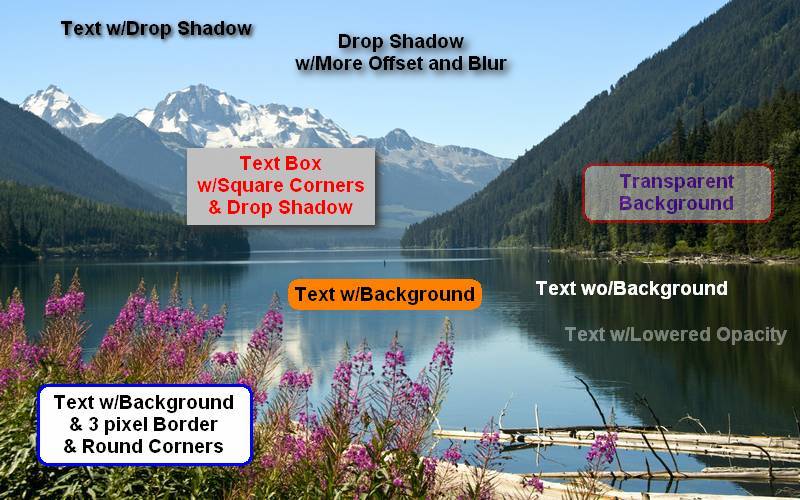
The Options for each Tool are across the bottom of the Draw Board. Each Tool has it's own options, but many options are common to several Tools. Each of the Options are described in more detail at the bottom of this page. Options for each tool are listed under the description of the tool and you can jump to the description of the option be clicking on it's icon. Use your browser's back arrow to return to the description of the Tool itself. I find the Draw Board most useful for annotating images, especially screen captures. What's nice is that you'll find a Draw Board in two other FastStone products (Capture and MaxView) and it works the same way in all the programs. First let's look at some of the ways text can be added to an image:
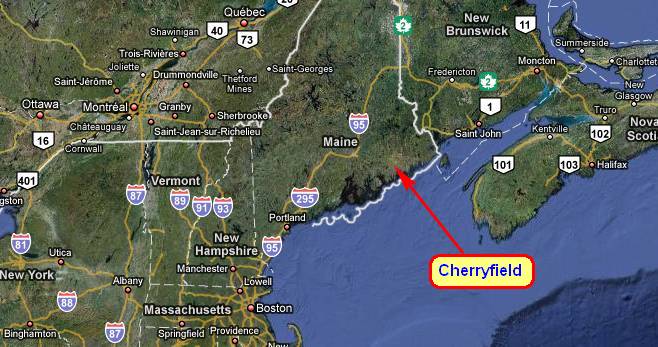
Using the Text Tool along with arrows (the Line Tool with Arrow Head Option) is a great way to quickly annotate a map:
Another Tool on the Draw Board I use a lot is the Highlighter:
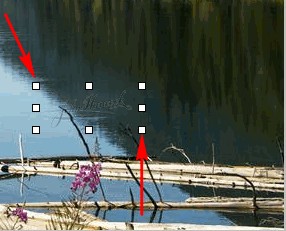
There are actually two Highlighter Tools, the Line Highlighter and the Rectangular Highlighter. I use to prefer the Rectangular one, but FastStone just added a feature allowing you to force the Line to be horizontal (by holding down Shift while drawing the highlight). Now you may find you like the Line Highlighter better. |
Sponsored Advertisements:
Sponsored Advertisements: Sponsored Advertisements: |
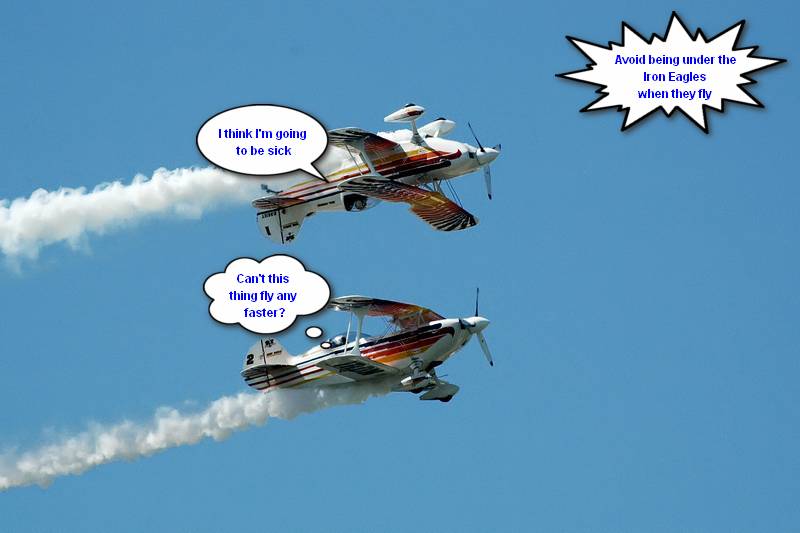
A new Tool added to the Draw Board in version 3.8 allows you to create speech bubbles, thought bubbles, and other callouts with interesting shapes:
![]()
![]()
![]()
![]()
![]()
![]()
![]()
![]()
![]()
![]()
![]()
![]()
![]()
![]()
![]()
Click on any Draw Board Button above for instructions.
Above you saw some of the many ways text can be applied to an image. To add Text, click on the "Text" tool. You'll notice your cursor turns into a big plus sign (not visible below) and an option bar opens at the bottom of the Draw Board:
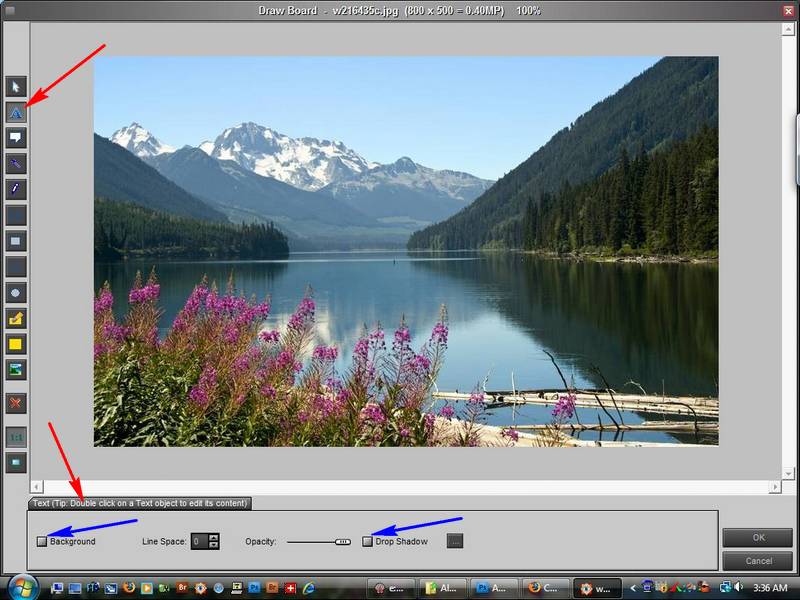
Note above that in this case both the Background and Drop Shadow boxes are NOT checked. Position your cursor (plus sign) in upper left corner of the area where you want to place the text, left-click, hold and drag diagonally on the image:

When you release the mouse button, two things happen. A text box appears (surrounded by handles which allow you to resize it) as does the Text Style dialog box:

Before typing text change any Text Style options, here I've changed the font size with the pull-down, turned off Bold, and changed the color of the text from red to black:

The blue arrow above points to the cursor where you can start typing text:

If you want to change the style of what you've typed, you must select it, either with the mouse or use Ctrl+A (select all). In this case I decided I really did want bold type so I clicked on the Bold button:

Once I click outside the text box (or choose another Tool) the text object is placed (finalized for the moment):

At this point I can reposition the text by single-clicking on it and dragging. To edit the text, or change it's style, double click on it.
When a text box is open for editing, the "Text Style" dialog window also appears:

This is where you pick the Font, its Size and other characteristics. Normally you'll also want to choose the Centered Text option if you use the Background option (this will automatically center the text in the text box). Also note that the right most icon in the Text Style dialog window is used to set the color of the Text. If you set all the type characteristics before typing text, you'll have no problem; however, you'll usually find you have to adjust size, color or something else after you see what it looks like. The secret is to click on the Text Box which will put the box with handles back around it, then use Ctrl+A to select all the text in the box. Now you can change the size, color, or whatever. You can also use the handles around the Text Box to resize the box, background and border.
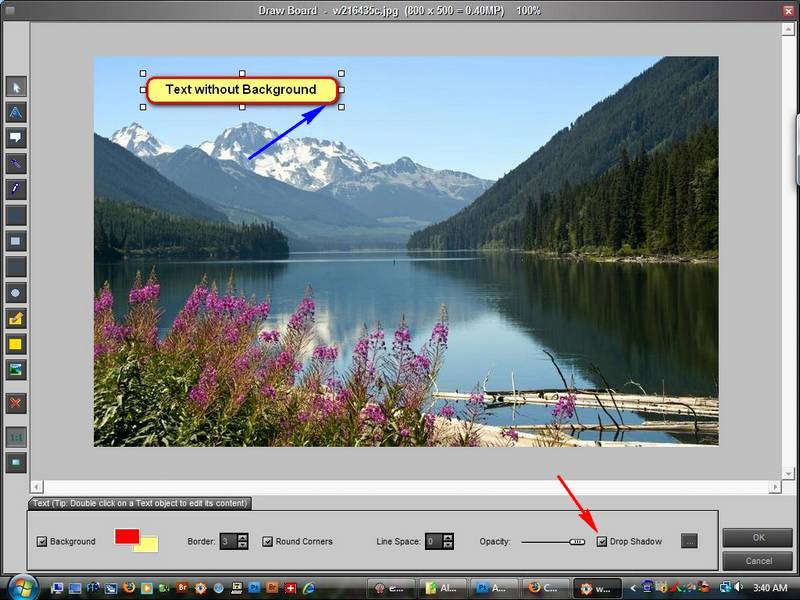
If you want to add a background, just check the Background box down where the Text Tool options are:

You can change the color of the background and border, as well as the thickness of the border (click on the text tool option icons below for more details). If you check the drop shadow box, a shadow appears under and to the right of the box:
If you remove the background, the shadow is now on the text, not the box:

Important: Note that until you click on the OK button you can still edit ANY of the objects you've placed on the Draw Board. Once you click on OK I recommend you immediately use Ctrl+S to save the image. If you don't FastStone will ask you if you want to save your edits when you select another image or folder, but at that point you may wonder what it's asking about until you get use to its behavior.
Text Tool Options (click on icon for description):
![]()
![]()
![]()
![]()
![]()
![]()
![]()
Use your browser's back-arrow to return here after clicking on any icon above.
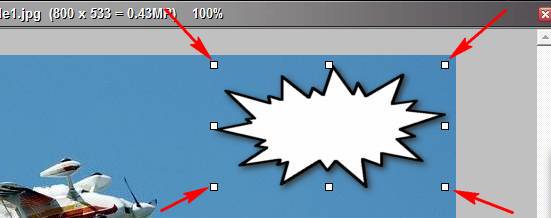
I call this the Thought Bubble, or Speech Bubble, but its real name in FastStone is the "Callout" Tool. Click on the tool, then click and drag diagonally on the image to open a callout box:
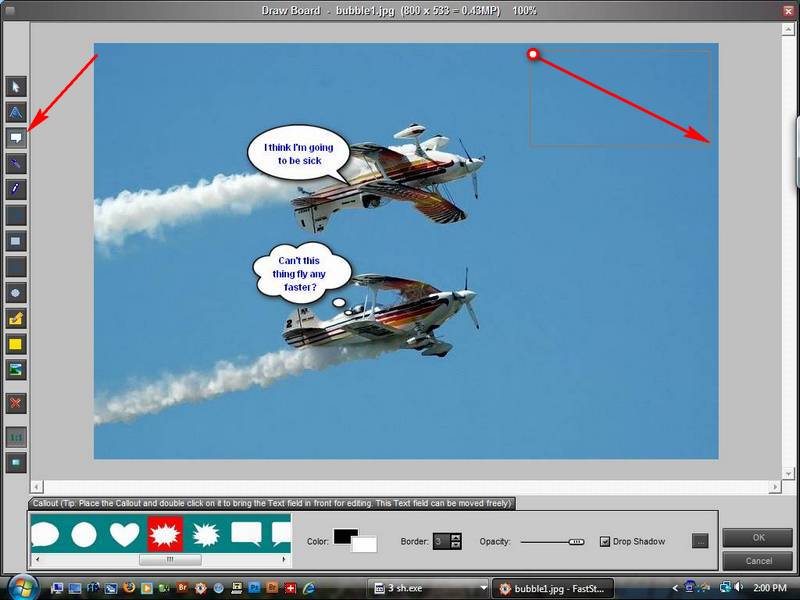
Above you'll see I clicked where the white dot surrounded by red is, and dragged in the direction the arrow shows. While you're doing this you'll note a faint box (see above) appears on the image. Once you release your mouse button, the callout appears:
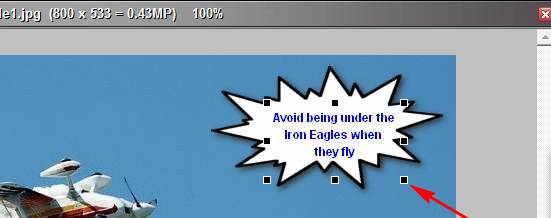
You can change the style of the callout (burst, thought bubble, etc.) by choosing a different shape from the choices on the options bar (bottom left in the complete screen shot above). You can move the callout box around by dragging it; or you can resize it using the handles on the box (arrows above).
Then double click on the callout box to open a linked text box in front of the callout box and type your text:

The handles shown above are the handles on the linked text box.
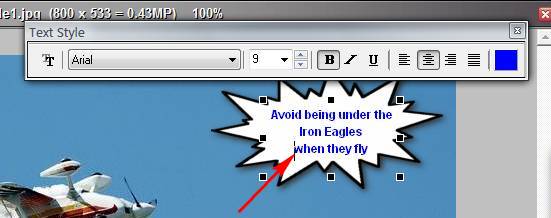
By dragging bottom right handle, the shape of the text box changes and the text re-wraps inside the new shape:
By double-clicking back inside the text box (so the Text Styles dialog reappears) and then single clicking between characters in the text (to position the cursor) you can use the Enter key to force a line break:
If you move the callout box the text will move with it, but once you've put text in linked text box, the text box will not automatically stay centered or resize as you reshape the callout box. Instead you can now move the text box around relative to the callout box (and as we saw above even reshape the text box), but even if you move it outside the callout box it will remain linked and move when you move the callout box.
Callout Tool Options (in addition to the callout shape) (click on icon for description):
![]()
![]()
![]()
![]()
Use your browser's back-arrow to return here after clicking on any icon above.
The Move Tool is used to reposition objects you've already placed. Click on the "Move" tool, then click and drag any object that has previously been placed on the image.
Note: Once you click the OK button (bottom right of the Draw Board window) you can no longer move, edit, or delete any of the objects placed.
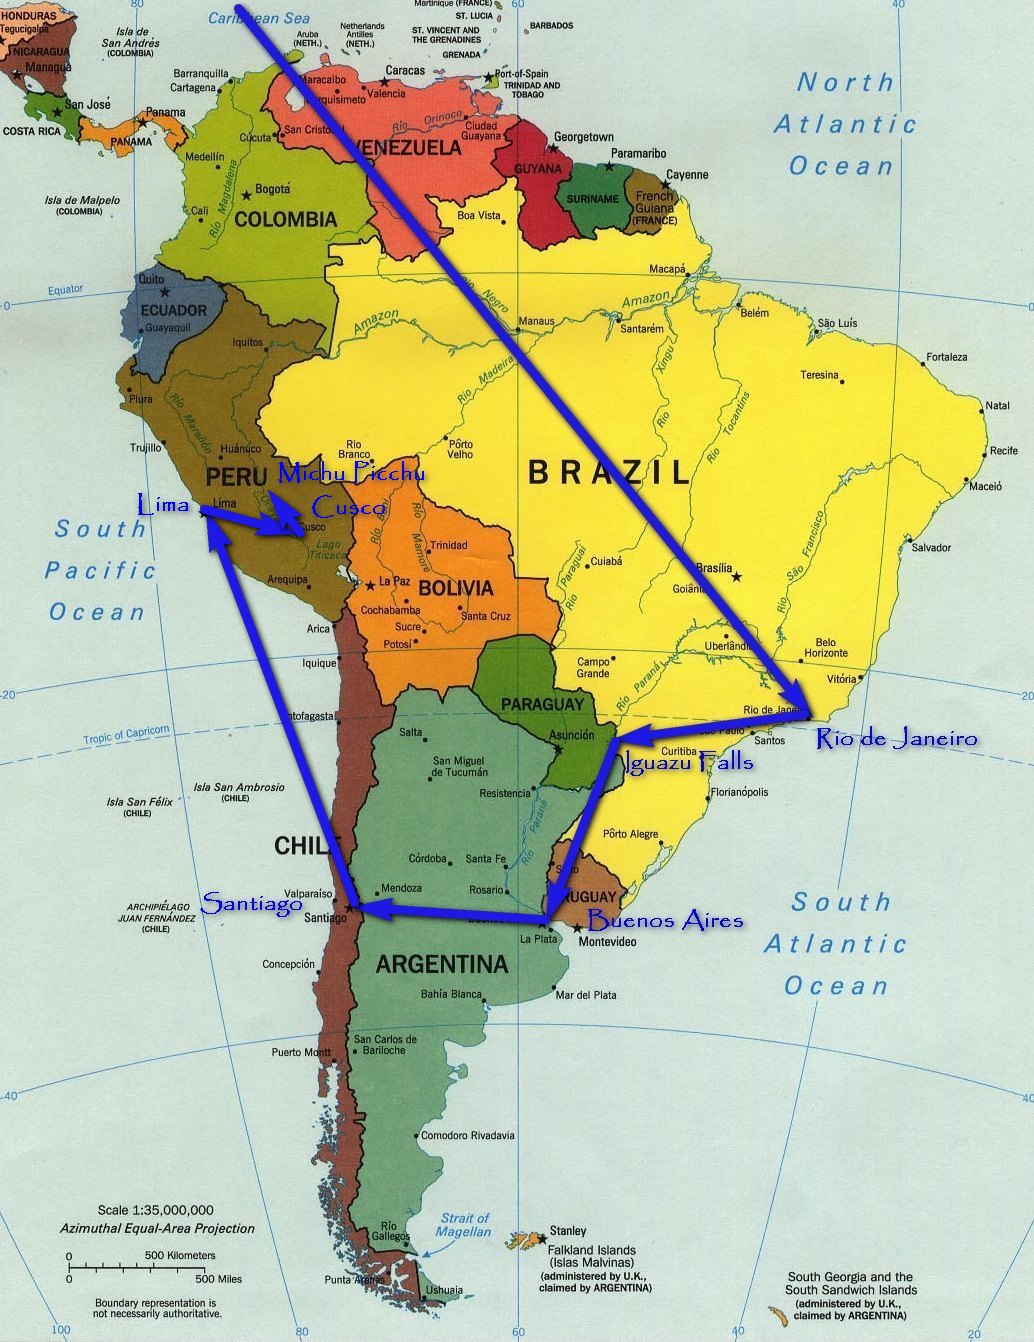
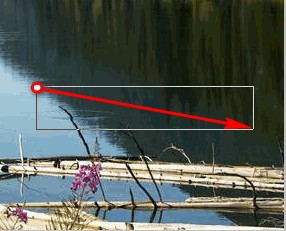
Click on the "Straight Line" tool, then click and drag on the image to draw a straight line. The Straight Line tool is very useful when annotating maps. Here Joe used the Arrow option and then used the Text Tool to label certain cities:
Line Tool Options (click on icon for description):
![]()
![]()
![]()
![]()
![]()
Use your browser's back-arrow to return here after clicking on any icon above.
Click on the "Pencil" tool, then click and drag on the image to draw a line. Personally I call this the Wiggly Line Tool, since that's what I usually get. Try it yourself.
Pencil Tool Options (click on icon for description):
![]()
![]()
![]()
![]()
Use your browser's back-arrow to return here after clicking on any icon above.
Click on the "Rectangle (Border Only)" tool then click and drag diagonally on the image to draw the border of a rectangle. Here's an example:

If you move your cursor over the rectangle until the shape of your cursor changes to this:

You can then reposition the rectangle by dragging:

After increasing the size of the Border from 3 to 8:

With round corners and a drop shadow option instead:

Rectangle (Border Only) Tool Options (click on icon for description):
![]()
![]()
![]()
![]()
![]()
Use your browser's back-arrow to return here after clicking on any icon above.
Click on the "Rectangle" tool, then click and drag on the image to draw a rectangle with an (optional) border and (optionally different) solid-color interior. If you don't want a border, set the border value to 0. The Rectangle Tool is just like the Text Tool, but without the text.
Rectangle Tool Options (click on icon for description):
![]()
![]()
![]()
![]()
![]()
Use your browser's back-arrow to return here after clicking on any icon above.
Click on the "Ellipse (Border Only)" tool, then click in the upper left corner of a rectangle that would contain the ellipse and drag diagonally on the image to draw an ellipse. As you drag you'll see the outline of the ellipse appear:
Don't worry if it's not in exactly the right place or the shape isn't right. As soon as you stop dragging and release the mouse button, the 8 handles appear:
You saw in the rectangle example above how to move the entire object. When the shape of the cursor changes to something like this:
you can adjust the shape of the ellipse by dragging that handle. Keep moving the ellipse and adjusting the shape until you get exactly what you want:
Ellipse (Border Only) Tool Options (click on icon for description):
![]()
![]()
![]()
![]()
Use your browser's back-arrow to return here after clicking on any icon above.
Click on the "Ellipse" tool, then click and drag on the image to draw the border and interior of a ellipse. Works just like the tool above, except that it is filled with a background color that can be set independently from the border color.
Ellipse Options (click on icon for description):
![]()
![]()
![]()
![]()
Use your browser's back-arrow to return here after clicking on any icon above.
Click on the "Rectangle Highlighter" tool, then click and drag diagonally on the image to draw a rectangular highlighted area:
For color I recommend one of the basic colors in the first row:
![]()
Until FastStone added a way to force the Line Highlighter Tool to draw horizontal lines, I thought the Rectangle Highlighter was more useful, now I'm using the Line Highlighter.
Rectangle Highlighter Tool Options (click on icon for description):
![]()
![]()
![]()
![]()
Use your browser's back-arrow to return here after clicking on any icon above.
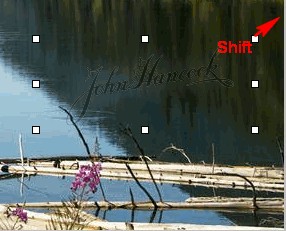
Click on the "Line Highlighter" tool, then click and drag on the image to draw a highlighted line. The width needs to match the lines you're highlighting, probably 20 pixels or more. Here's my attempt to do the same thing using the line highlighter ... it was even worse when I tried to do it using my tablet:
However, an update to FastStone Image Viewer 3.8 was released which allows you to draw a straight, horizontal line if you hold down the shift key while drawing the line (same shortcut Photoshop uses for drawing horizontal lines).
For color I recommend one of the basic colors in the first row:
![]()
Line Highlighter Tool Options (click on icon for description):
![]()
![]()
![]()
![]()
![]()
Use your browser's back-arrow to return here after clicking on any icon above.
You may remember that you could often see a watermark, a recognizable image or pattern, in quality paper. Those watermarks were caused by thickness variations in the paper that appeared as shades of lightness or darkness when viewed in various lights.
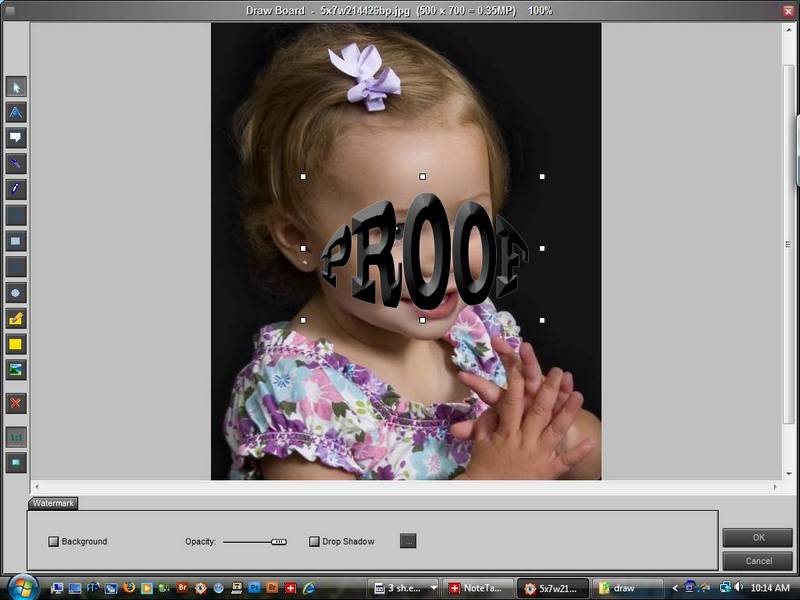
FastStone allows you to simulate a watermark by placing a second image over the one you are editing, and by adjusting its opacity make it seem transparent. Typical uses include adding a signature to your image or placing something over the image (like the word "Proof") to prevent non-permitted uses.
The watermark can either have a transparent background, or if it doesn't the color in the corner is made transparent wherever it appears in the watermark. For example, for a signature watermark you might use a transparent GIF like:
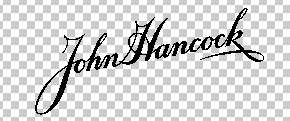
And as an extreme, you could also use a JPG like:
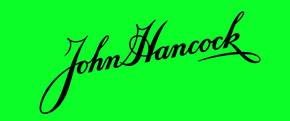
and both would work the same. However, your watermark is more likely to have a white background (instead of a weird color like the one above) if it doesn't have a transparent background.
My experience is that watermarks with a transparent background work slightly better. Depending on the size of the image being edited and the watermark image you have a better chance of getting a color cast, or halo, with the non-transparent background. This happens because when the watermark is stored the pixels right next to the watermark are often not really the color of the background, but some other color created by the compression.
To place a watermark, click on the "Watermark" tool and an "Open" dialog window will open. Navigate to the image to be added as a watermark and click "Open". Click and drag diagonally on the image to specify the rectangular area into which the watermark will be placed:
When initially placed, no mater what shape you make the rectangular area, the image used as a watermark will not be distorted. Here you see that the upper left corner was placed as requested and the height is the same as the rectangular area, but the width is less to avoid distortion:
The watermark can be resized (and potentially distorted) by dragging one of the handles that define size of the watermark. To avoid distortion, use the standard trick of holding down the shift key as you drag a handle:
This is also a good example of why you want to create watermarks in black, white, and probably several other colors. You can then use the one that works best with background. Here's the image with the watermark applied:

Here's another file you might use as a watermark:

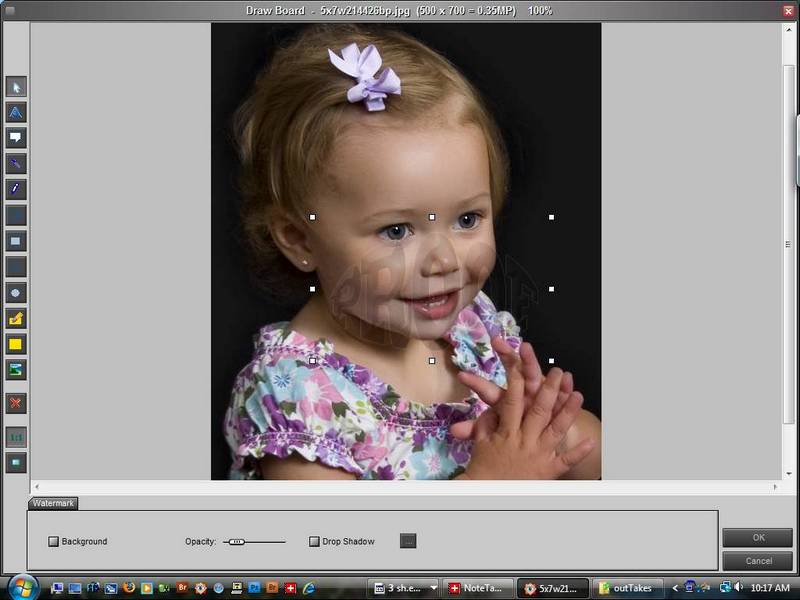
(The actual watermark file is 2500 x 1500 pixels, and the John Hancock one was 2400 x 1000 pixels. Starting with a large files makes for better looking watermarks, no matter what size image you apply them to.) Here it is being placed as a watermark before adjusting the opacity:
After adjusting the opacity:
And after adding a white shadow by setting the drop shadow Darkness to 0:

For more information on drop shadows, click on the icon below.
Watermark Tool Options (click on icon for description):
![]()
![]()
![]()
Use your browser's back-arrow to return here after clicking on any icon above.
Click on an object that has been placed on an image and click the "Delete" button to remove it.
The "Actual Size" button will make the image as the actual size of the file.
The "Fit" button will make the image fit into the screen. This is useful when the actual size of the image exceeds the size of the screen.
![]()
![]()
![]()
![]()
![]()
![]()
![]()
![]()
![]()
![]()
![]()
Click on any Option above for instructions.
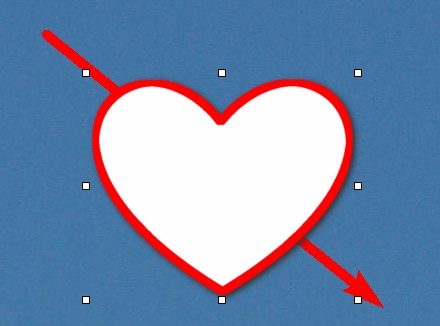
If you put multiple objects on an image and they overlap it's important to be able to control which one is partially hidden by the one in front of it. In this case I created a heart callout, then added the arrow. Since the arrow was created last, its on top. To change this, right-click on an object (in this case the heart) and you'll get the choices:
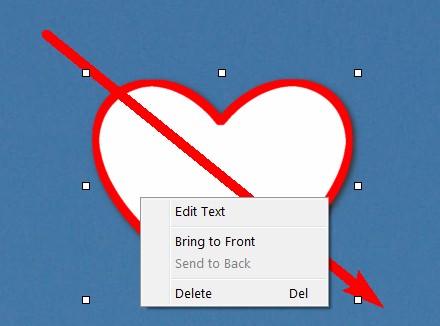
Just choose "Bring to Front" to put the heart on top:
If the object is to have a background other than the image that it is on, click the "Background" check box. With the Text Tool, as soon as you check the Background box, the Border and Background Color option to appear so you can set their colors.
When used with the Watermark Tool, the background option causes the background color of the watermark image to appear.
To change the color of the border click on the upper left color box (red above) or to change the background color click on lower right color box (blue above). Clicking on either brings up this color dialog box:
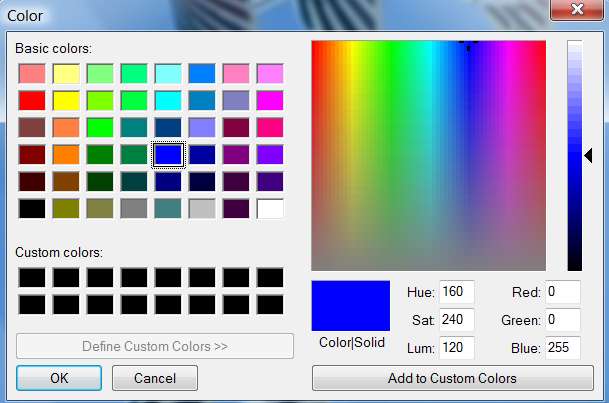
You can either pick a basic color by clicking on it, and then the OK button; or you can choose any color you want on the right and then press the "Add to Custom Colors button". The new custom color should be selected, if not select it, then click the OK button.
The "Border and Background" option is available for the draw tools: Text, Rectangle, Rectangle (border only), Ellipse, and Ellipse (border only).
"Line Space" is used to adjust the amount of space between lines of text. Enter the number of pixels in the box or use the up and down arrows. The "Line Space" is available only with the Text Tool.
Adjust the "Opacity" slider to change how much the image shows through the object. All objects have an "Opacity" option. I find I use it most with Highlighter Tools and to make backgrounds somewhat transparent.
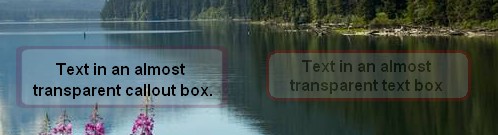
Note that Opacity works slightly different for the Text Tool and the Callout Tool. When you adjust the opacity of a text box, the text, the background and the border all become more transparent. With a Callout, only the background and border become transparent, not the text. The last two callout shapes are rectangles with square and round corners ... this effectively gives you a text box where the background can become transparent, but not the text.
Although Opacity is just a slider, if you hold still while sliding a Tool Tip will pop up showing you the opacity percentage ... you might find this useful if you're trying to get the opacity of different objects to match.
If you really want some other combination of shapes, colors, borders that don't become transparent while backgrounds do, etc. you can always build exactly what you want using a combination of tools (e.g., Text plus Rectangle, Border Only).
There's also an example above which shows adjusting the opacity of a watermark.
To add a drop shadow to the object, click the "Drop Shadow" check box. All objects can have a "Drop Shadow" applied, but that doesn't mean you always want to use one.
To adjust the characteristics of the drop shadow, click the ellipsis ![]() beside the drop shadow check box:
beside the drop shadow check box:
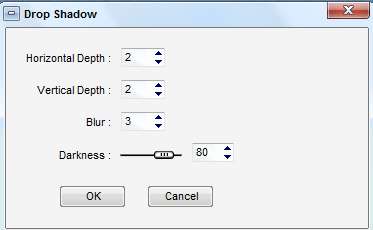
Horizontal and Vertical Depth control how far the drop shadow is offset to the right and down. Increasing the Blur makes a larger, fuzzier shadow. Again there is no one right choice. Sometimes a smaller, more distinct shadow works better, especially in the case text (without background); in other cases I like a larger, fuzzier shadow ... it's all a matter of taste and what seems to work best in a particular case. Don't be afraid to experiment.
The Darkness slider allows you to change the shadow from black (far right) to white (far left), or to shades of gray. FastStone doesn't preview the changes, you have to press the OK button to see them.
The best values to use to adjust the drop shadows are a function of the resolution of the image and the size of the object with the drop shadow. Just to give you a sense of what these might look like, the following are 100% crops of 24 point type from a 7 Mpix image:

With drop shadow and the default settings: Depth Offsets of 2, Blur of 4, and Darkness of 80:

Increasing the Darkness: Depth Offsets of 2, Blur of 4, and Darkness of 100:

Removing the Blur: Depth Offsets of 2, Blur of 0, and Darkness of 100:

Increasing the Offsets and adding a little Blur: Depth Offsets of 4, Blur of 2, and Darkness of 100:

If the text has a background, the drop shadow is on the box, not the text:
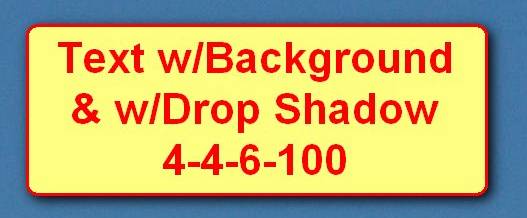
As indicated the Depth Offsets above are 4, the Blur is 6, and the Darkness 100.
Now let's look at how a drop shadow effects a watermark. First without any drop shadow we see a hint of halo around the watermark even though this was a very high resolution, transparent watermark:

Here is the same watermark with a drop shadow, but with the Depth Offset and Blur set to zero. One might think those settings are the same as no drop shadow, but I think it looks much better: (The darkness in this and the samples that follow are all 100.)

And with the slightest increase in Blur: Depth Offset 0, Blur 1:

Another slight increase in Blur: Depth Offset 0, Blur 2:

Another slight increase in Blur: Depth Offset 0, Blur 2:

As you can see, the adjustments are subtle. Only you can decide what looks best for the particular case.
Tip: Remember to press the OK button to see view the adjustments after you've made them. If they're not quite right, just press the ellipsis button again and re-adjust.
To make the object a little less distinct, click the "Blur" check box. Only the two Highlighter Tools have a "Blur" option. With the Opacity set to the max, the Blur option makes what's highlighted totally unreadable, making the option at first seem useless, but people have found it very useful for hiding sensitive information (ID number, age, etc.) especially on scanned documents or screen shots.
Another suggestion, when you're not trying to hide the information completely is to set the Opacity fairly low, you might also find that useful in some situations.
To choose the width of the object, type the number of pixels in the "Width" box, or use the up and down arrows. The Width option is used to set the size (width), in pixels, of the straight line, pencil, or line highlighter.
To choose the width of the border of the object, type the number of pixels in the "Border" box, or use the up and down arrows. "Border" supports straight rectangle (border only), rectangle, ellipse (border only) and ellipse.
To add an arrow head to a straight line, click the "Arrow" check box. "Arrow" is only an option for the Straight Line tool.
To round the corners of rectangular objects click the "Round Corners" check box. "Round Corders" is an option for the Text, Rectangle (border only), and Rectangle Tools.
To choose the color of the object, click the "Color" option. A color dialog window will open:
You can either pick a basic color by clicking on it, and then the OK button; or you can choose any color you want on the right and then press the "Add to Custom Colors button". The new custom color should be selected, if not select it, then click the OK button.
The "Color" option is available with the draw tools: straight line, pencil, rectangle (border only), rectangle, ellipse (border only), ellipse, line highlighter and rectangle highlighter.
Suggested next choices: