
Most people never bother, but it's possible to change the letters assigned to hard drives, DVD/CD-ROM drives, or any device that acts like a drive (for example, card readers or flash drives).
Why bother? If you use SyncToy to backup to an external hard drive, the folder pairs you create will only work if the drive has the same letter each time you attach it. Windows normally assigns drive letters in the order devices are plugged into the system, so letters will change depending on what's turned on when you boot your computer. When possible, I try to use a drive letter that I can associate with the name/label I gave the drive.
For example, if you have an external hard-drive which you've labeled/named "Yellow", you might want to assign it the letter "Y". Once you assign it the letter "Y", Windows should remember that and always assign it that letter when you plug it in.
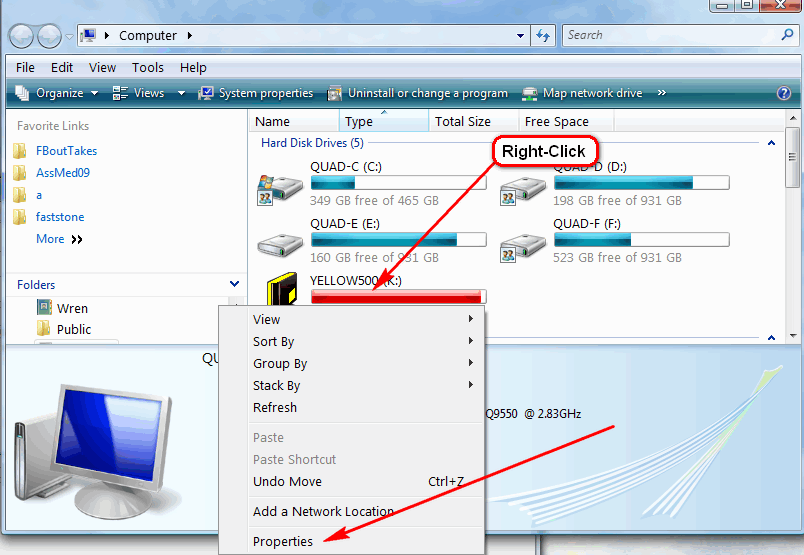
First I recommend you change the volume label on the drive. Go to "Computer" and right-click on the drive, then choose properties:
The volume label is at the top of the General tab:
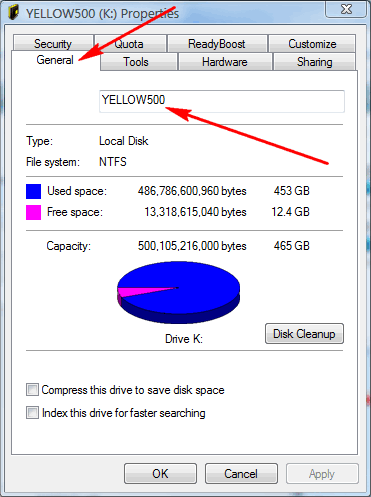
You can type any name you want where it says YELLOW500 above. However, it must be a short name and I recommend using capital letters.
For external drives, I name them based on the color label I put on the outside and the size of the drive; the drive above is 500GB and has a yellow label on it. (Internal drives I name based on the name I gave the machine and the drive letter it is when mounted on that machine ... that way I know what drive it is when I use "Map Network Drive" to mount it on another machine on the network.)
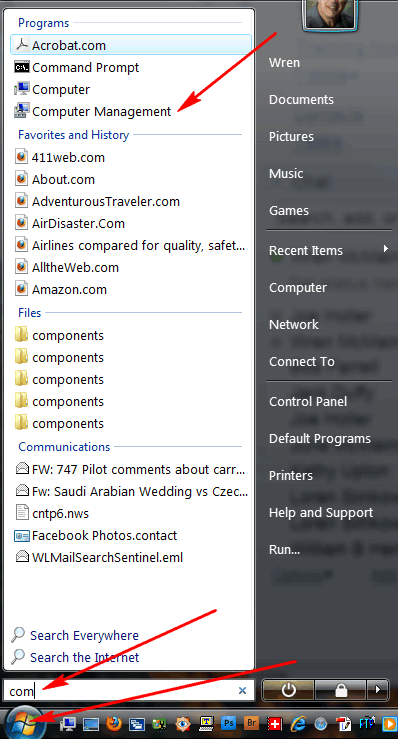
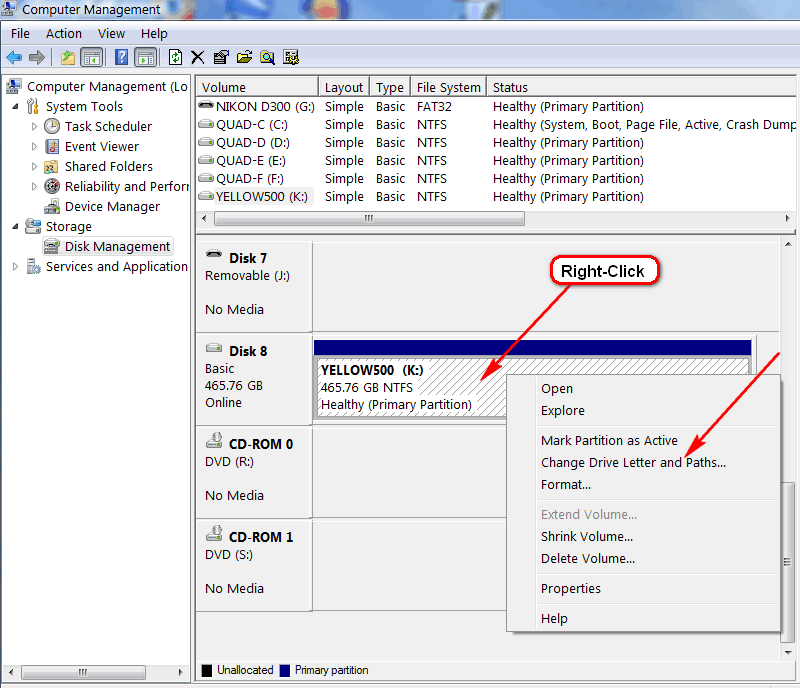
Changing the drive letter is harder than changing the volume label (because Microsoft doesn't want you to change it unless you know what you're doing). First click on the "Start" button (now a Windows icon) in the corner of your screen, then just above it start typing the word "computer". After just about three letters you should see the program "Computer Management" appear need the top of the search results:
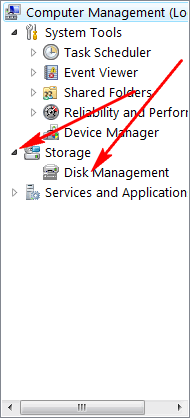
Start the "Computer Management" program by clicking on it. Then on the left hand side, choose "Disk Management" (you may first have to click on the little mark next to "Storage" to expose the "Disk Management" choice):
A list of your drives should now appear on the right. Scroll down and find the one whose letter you want to change and right-click on it. (This is why it's good to change the volume label first ... makes it easier to find right drive.) When you right-click you should get choices like these:
Choose "Change Drive Letter and Paths ..." and you should then see:
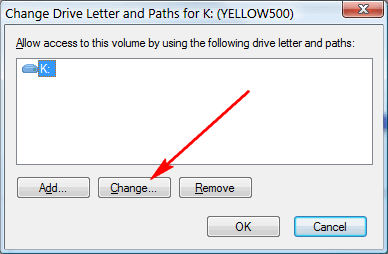
Click on "Change..." and you should see this:
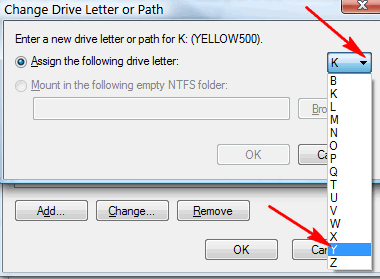
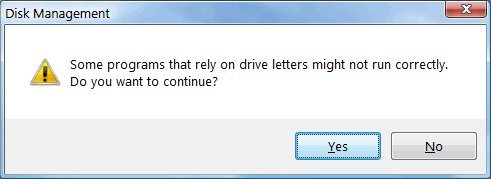
Use the pull-down to assign an unused drive letter. Once you click on OK it will ask you if you really know what the hell you're doing and all the trouble it's going to cause. Pretend you do.
On occasion you have to reassign other drive letters first, to free up the letter you need, but be careful ... you can really get yourself in trouble if you don't know what you're doing.
I also like to change the letter assigned to my DVD/CD-ROM drive so it's letter doesn't change later when I add a new internal hard drive. I like to use some logic when I assign letters, so for example, I assign the DVD/CD-ROM drive the letter "R" for ROM (read only memory). I always do this as soon as possible with a new machine to minimize the number of references to the original drive letter in the registry.
There are a couple of other things I do with external drives to make them easier to find. One is I create a folder on the drive named something like the volume label, but starting with the # character so it sorts to the top alphabetically (there are a few special characters that sort before "A", # being one of them):
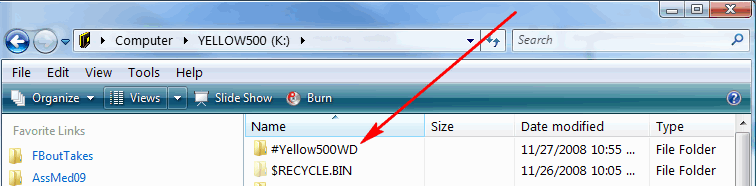
I do this because some programs (like a stand-alone backup programs) don't display volume labels. However, when you see this folder you can be assured you have found the correct drive. (I added the WD to the name above to remind myself this is a Western Digital drive.)
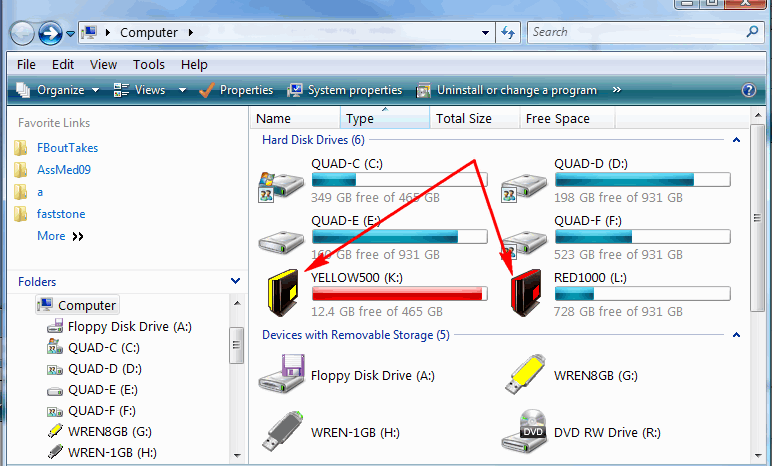
Another I like to do is change the icon associated with each removable drive. Notice how the icons below are color coded to match the labels on the drives:
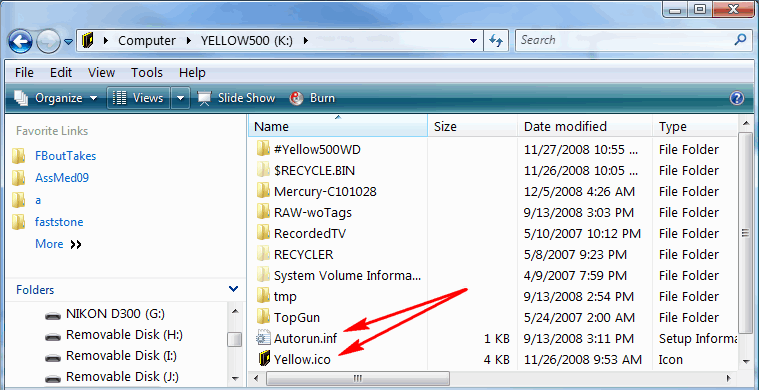
If you like them, you can download my External Drive Icons. Unzip them, and then based on the color drive you have, place the two files you find in the folder of that name at the top level of your external drive. One will be named Autorun.inf, the other Color.ico:
It's as easy as that, next time you plug in the drive the special icon should appear as shown above.
As you see above, I also have special icons for my USB flash drives.
Suggested next choices:
ImagingTips.com Site Map
![]()
[an error occurred while processing this directive]