
Audacity is the program I recommend for recording and editing sound. It's a free program and you can always find the latest version at www.audacityteam.org. In addition to installing Audacity you'll also want to install these import/export plug-ins: Lame, FFmpeg, and LADSPA. Links to all of these can be found on the Audacity Team website, or you can download the current versions (as of January, 2019) here:
Audacity Install Program for Windows, v2.3.0
Lame MP3 encoder plug-in
FFmpeg collection of encoders
LADSPA plug-ins
On-line Audacity Manual
Audacity Manual v2.3.0, if you want to download a local copy
What follows was written 10 years ago to show how to use Audacity to create voice-overs for a slide show, but the first part on Audacity is worth reading, nothing much has changed, you can stop when you get to the part about ProShow unless you're interested.
For making Slide Shows I recommend ProShow Gold. In ProShow options, I specify Audacity as my audio editor. You can get Audacity free from www.audacityteam.org. I recommend going ahead and using Audacity version 1.3 instead of version 1.2. Download and install. While you're there you also want to get the Lame encoder (under optional downloads) which you can unzip into the audacity folder. This encoder is needed to export MP3 files from Audacity.
The best technique for creating voice-overs depends on the show you're creating. Some shows are best created by creating the script (the voice-overs) first and then add slides to the time line and attach voice-overs, editing the timing of the slides to fit. That technique seems to work best when you're telling a story and adding images to fit the story; in this case it's easiest to create the voice-overs in Audacity. Other times the images are the story and you just occasionally want to add voice-overs to talk about some of the images; in this case it's easiest to create the voice overs from ProShow.
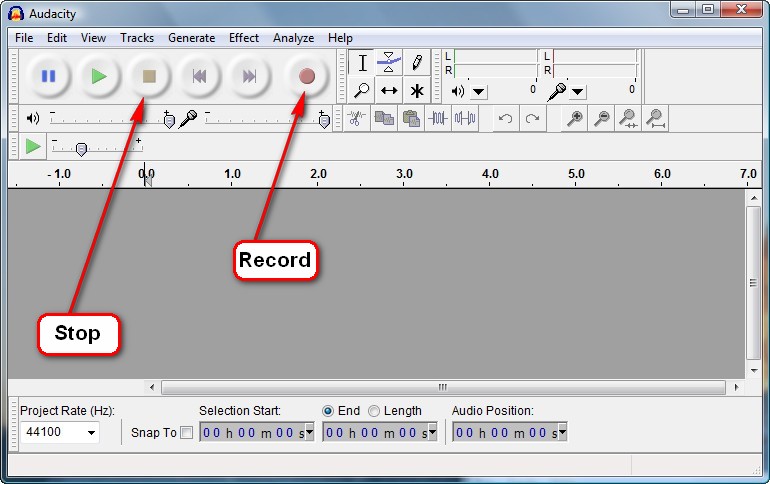
To create voice-overs in Audacity, click on the "Record" button, record your sound byte and press "Stop".
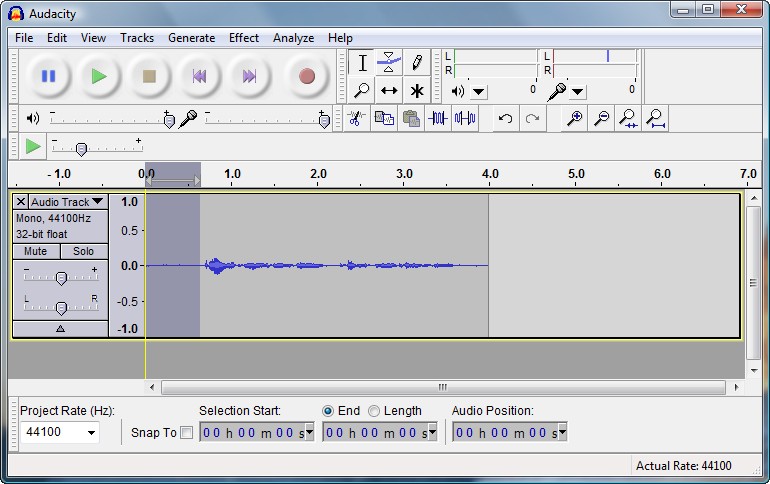
Select the lead-in (before you began speaking) and press the delete key ...
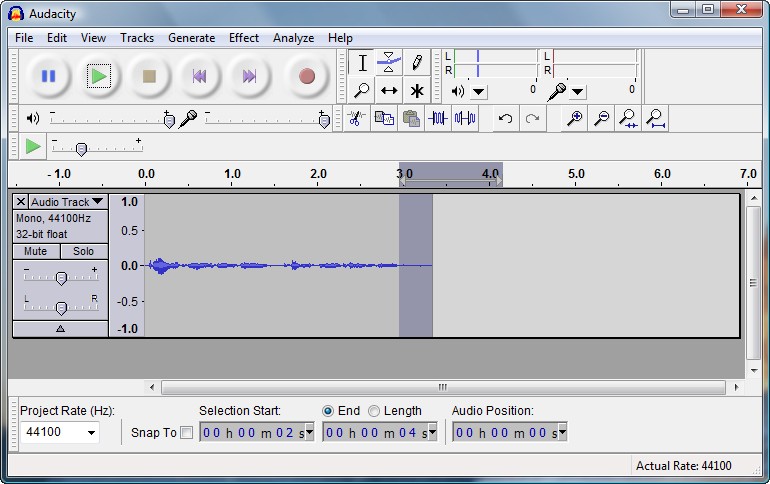
If their is any question you're deleting too much, press the "Play" button to double check before deleting. Select the lead-out and press "delete" ...
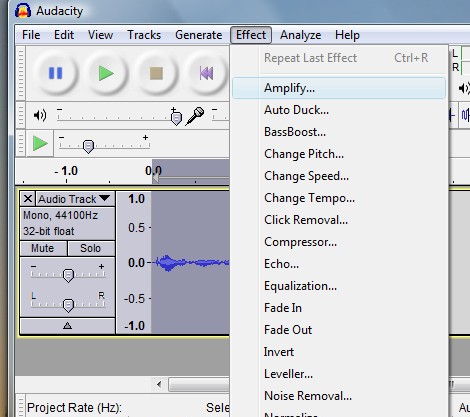
Next select the entire recording (you can either select using the mouse, or use Ctrl-A). Under "Effect", choose "Amplify" ...
You'll get a menu like this, with the maximum amplification already filled in, just press "OK"...
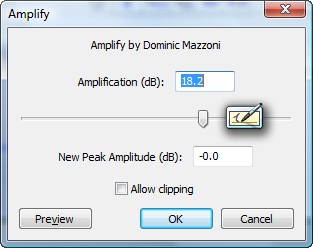
(Occasionally, if you speak one word much louder than the rest, this may not amplify it enough. In this case do it again, but this time check the "Allow Clipping" box and specify a new peak amplitude of 5 or 10; 10 will double the current maximum level.)
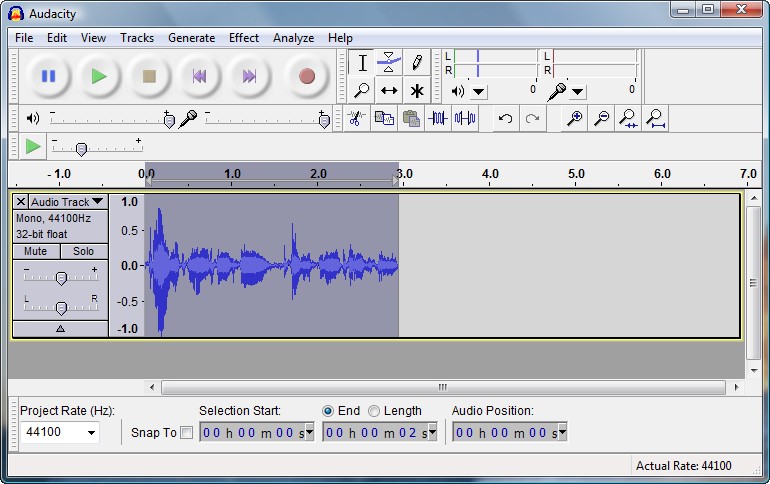
The sound wave for good sound byte should look something like this ...
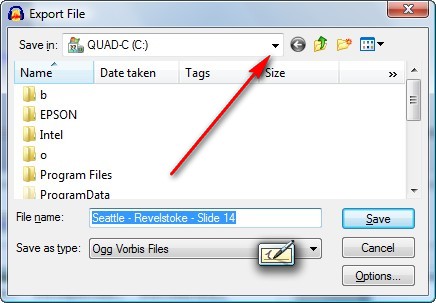
To save the clip, under "File" choose "Export", you'll get a menu like this ...
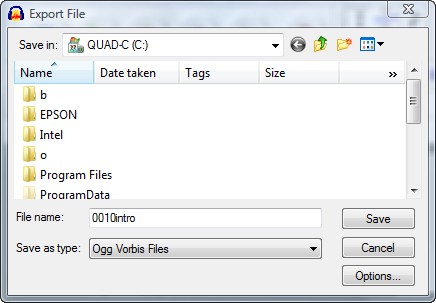
On the "Save as type" pull-down, choose "Ogg Vorbis" (or MP3 if you've installed the Lame encoder). Be sure you save the sound clips in the folder with the images for your show. I recommend you name the files with leading numbers (like 0010, 0020, etc.) and some kind of name to remind you what the clip is about ... the leading numbers will keep them roughly the order you plan to use them in your show. You'll also get a menu asking you to fill in genre or metadata information, the one from Audacity 1.3 looks like this:
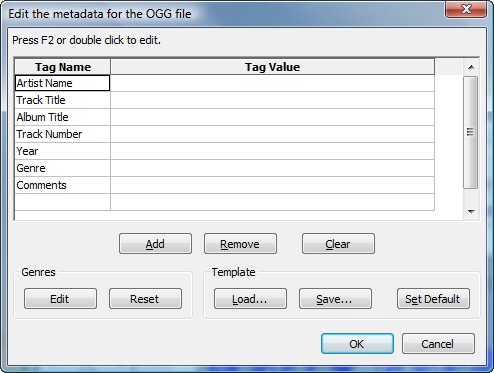
You can ignore it, just click OK.
(What follows shows using the voice-over in ProShow)
If you already have your images in ProShow, and just want to add a voice-over, double click on an image on the time-line, and choose the "Sounds" tab, then click on "Record Voice-Over":
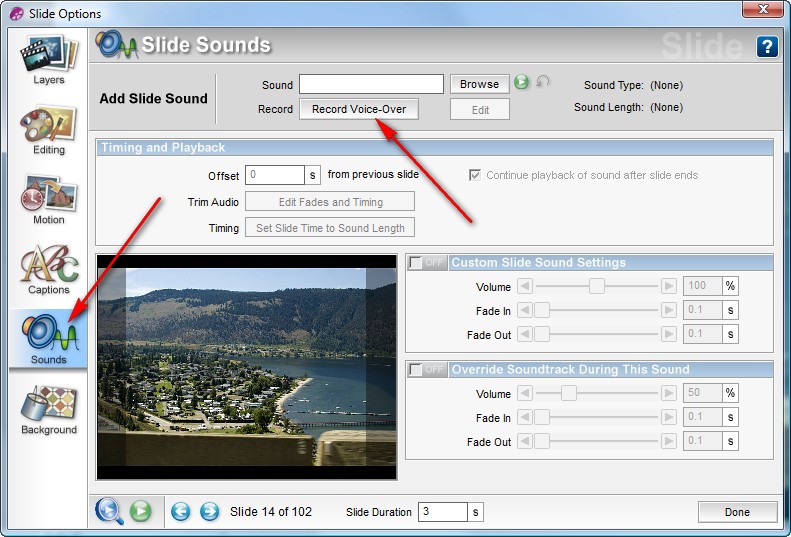
Which gets you this menu.
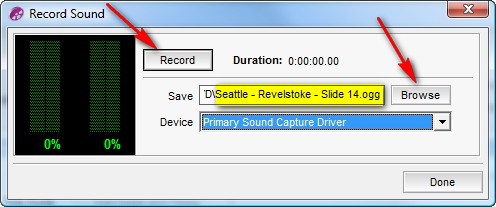
You see it's already assigned a name (highlighted) based on the name of the show and the slide number (along the time-line). The very first time you do this click on the "Browse" button to make sure it's putting the sound clip in the right folder (and not the folder with the previous show you created). When you're ready, click "Record". You get this menu:
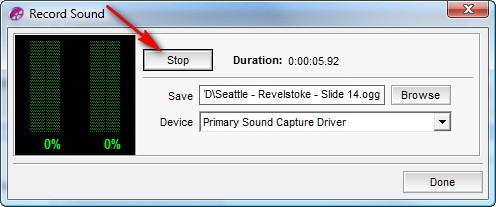
Beware: When you're through recording, click "Stop", then "Done". I keep making the mistake of just clicking "Done" and loosing the recording. Once you click "Stop" and "Done", you're back to this menu:
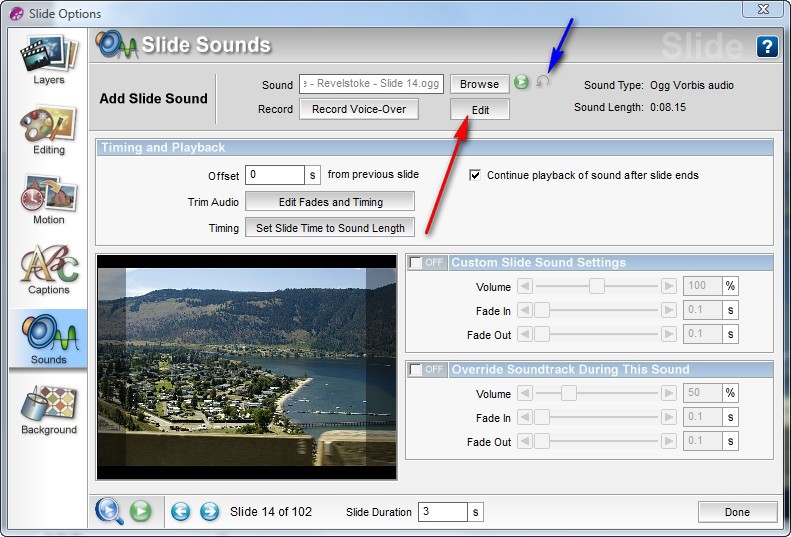
You'll notice the "Edit" button is no longer grayed-out. Click on it to open it in Audacity, and repeat the steps shown above (delete lead-in and lead-out, amplify, export). When you export you'll get:
Use the pull-down the first time to double check the folder it's putting it in (change if it's wrong). You'll get a warning that you're overwriting the file ... that's good if you don't get the warning you've lost it in some other folder. Close Audacity, ignore the warning about saving the project; you've just exported the sound wave, you don't need to save the project. (If you don't close Audacity you'll end up with dozens of copies open.)
Note: The blue arrow above points to the button to remove a voice-over from a slide (it's not obvious). If you need to move a voice over to another slide you need to remove it from the current slide and attach it to the other using the "Browse" button (a little to the left of the blue arrow).
Suggested next choices:
ImagingTips.com Site Map
[an error occurred while processing this directive]