
[Skip to Scanning Recommendations, updated 7/8/2009.]
6/2012 update: I continue to be pleasantly surprised by this scanner. This summer I decided to scan a lot of old B+W negatives. Initially it seemed they had deteriorated, the quality was terrible. But when I looked at them with a loupe I couldn't see any problem. Solution turned out to be Digital ICE. DO NOT USE IT WITH B+W.
Now I've discovered a lot of rolls of 120 film. I had forgotten the scanner came with all kinds up transports, including ones for 120 and medium format films. I did have trouble a first, it wanted to scan 6 negatives as 8 images. It was treating them as 3x2 images instead of 2x2. Solution turned out to be under the configuration button ... if you have any questions e-mail me.
2009: About 8 years ago I copied almost 2000 slides using a camera; it was fast, about 20 seconds per image. But because it was a 3 Mpix camera, the resulting images were only a little over 2 Mpix. I decided that if I was going to scan my color negatives and the rest of my slides I would spring for a new scanner. This scanner can scan slides and film at 12 Mpix, 24 Mpix or 48 Mpix.
There are two reasons why I want to scan color negatives: The prints of the best images have all disappeared into kids photo albums and are scattered around the country; and many of our old prints were done on satin (or luster) paper which when scanned, because of the reflective grains on the paper, have patterns that make them look like they came out of a newspaper.
So far I've been really impressed by my new scanner. In the first two days I've scanned over 500 slides and negatives and like most us, I haven't read the manual yet. I don't really recommend that. Before doing much more I really should read the manual and the book on Photo Restoration Amazon conned me into buying at the same time.
Although it came with a lot of other software, I've just been using Epson Scan (which is the TWAIN interface it comes with). It has two modes and I recommend using the Professional Mode which gives you more control over your scans.
The first experiments I did were to determine the resolution I wanted to use when scanning slides and negatives. Scanner interfaces all talk in terms of dpi (which makes sense since the scanner is scanning a certain number of dots per inch). However, what you want to consider when scanning is the resolution of the resulting image in megapixels.
I experimented with scanning film at three different resolutions:
My objective is to scan once for archival purposes. Scanning at 4800 dpi didn't take that much longer than 3200 dpi and I figured that 24 Mpix images where about all I would ever need given the original quality of the 40-50 year old negatives and slides I was scanning. I does take extra time to scan at 6400 dpi (maybe a minute per image) and of course the result is much bigger to store and slower to display. (Later I was surprised to find that Digital ICE was actually faster on a 48 Mpix image, so with Digital ICE there is very little difference in time between scanning at 12 Mpix and 48 Mpix. Without Digital ICE it takes just over a minute to scan a slide at 12 Mpix, vs. 2.33 minutes at 48 Mpix.) The scanner interface also allows you to scan at 9600 dpi and 12,800 dpi, but my guess is the result is interpolated. I didn't try either, maybe the manual will tell me.
The next thing I experimented with were some of the adjustment options. Here's what the interface looks like:
Adjustments Include:
As I said, instead of reading the manual I just started experimenting ... but at least I did push the HELP button on the interface which explains most things.
Scanning Recommendations Update: Here are my current thoughts on these options:
Tip : One setting I recommend changing (click on Configuration button): the size of the preview window ... it defaults to small ... change it to the largest size that fits on your screen (depends on your screen resolution). Another setting I like (it doesn't always remember it) is to express the target size in pixels (which I find helps me know if I'm scanning at a high enough resolution):

First, let's look at this slide which looks like this when scanned with no adjustments:

When scanned with Auto Exposure, Unsharp Mask, Grain Reduction, Color Restoration, and Digital ICE, you get this result:

Note how the dust and large scratch were removed:
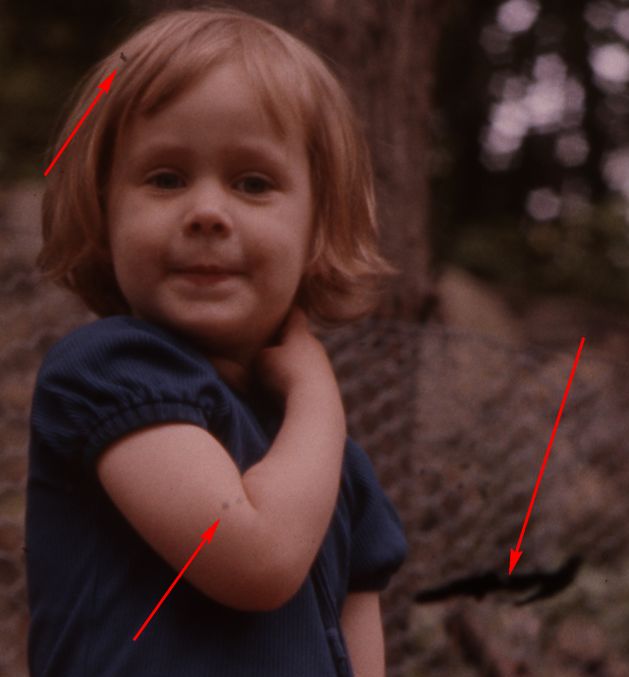
Several reviews I read about this series of Epson scanners complained about how long Digital ICE (Dust and Scratch removal) took to run. They're right, it does take a LONG time, but it's pretty amazing what it does.
Here's what the HELP file says: Compared with Dust Removal, DIGITAL ICE Technology gives you much higher correction quality in the scanned images. However, DIGITAL ICE Technology requires a large amount of system resources and a long scanning time. Therefore, try DIGITAL ICE Technology only when you cannot correct the scanned images using Dust Removal.
Some reviewers also complained about the quality of the scan when Digital ICE was used (claimed it lost sharpness and was softer) ... I experimented on lots of images and haven't seen that at all. Here's are a couple of sample images showing my daughters talking to each other through a dryer vent hose 35 years ago:
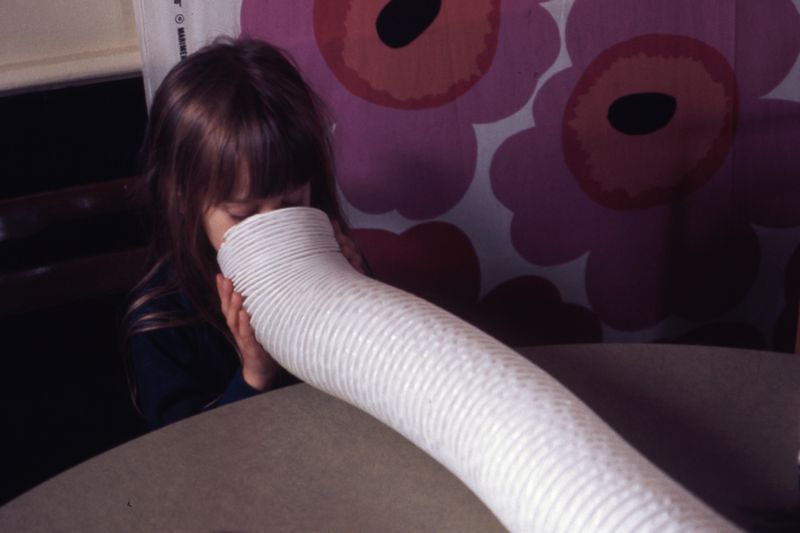
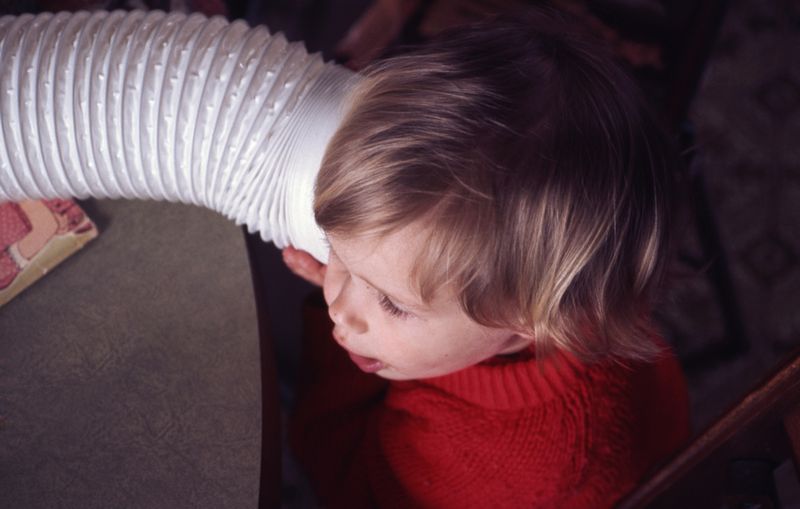
But remember, most of the images shown here have been scaled down for this web page, the actual scans where all done at 24 Mpix (about 6000 x 4000). Here's a crop from the full size image as scanned without Digital ICE:
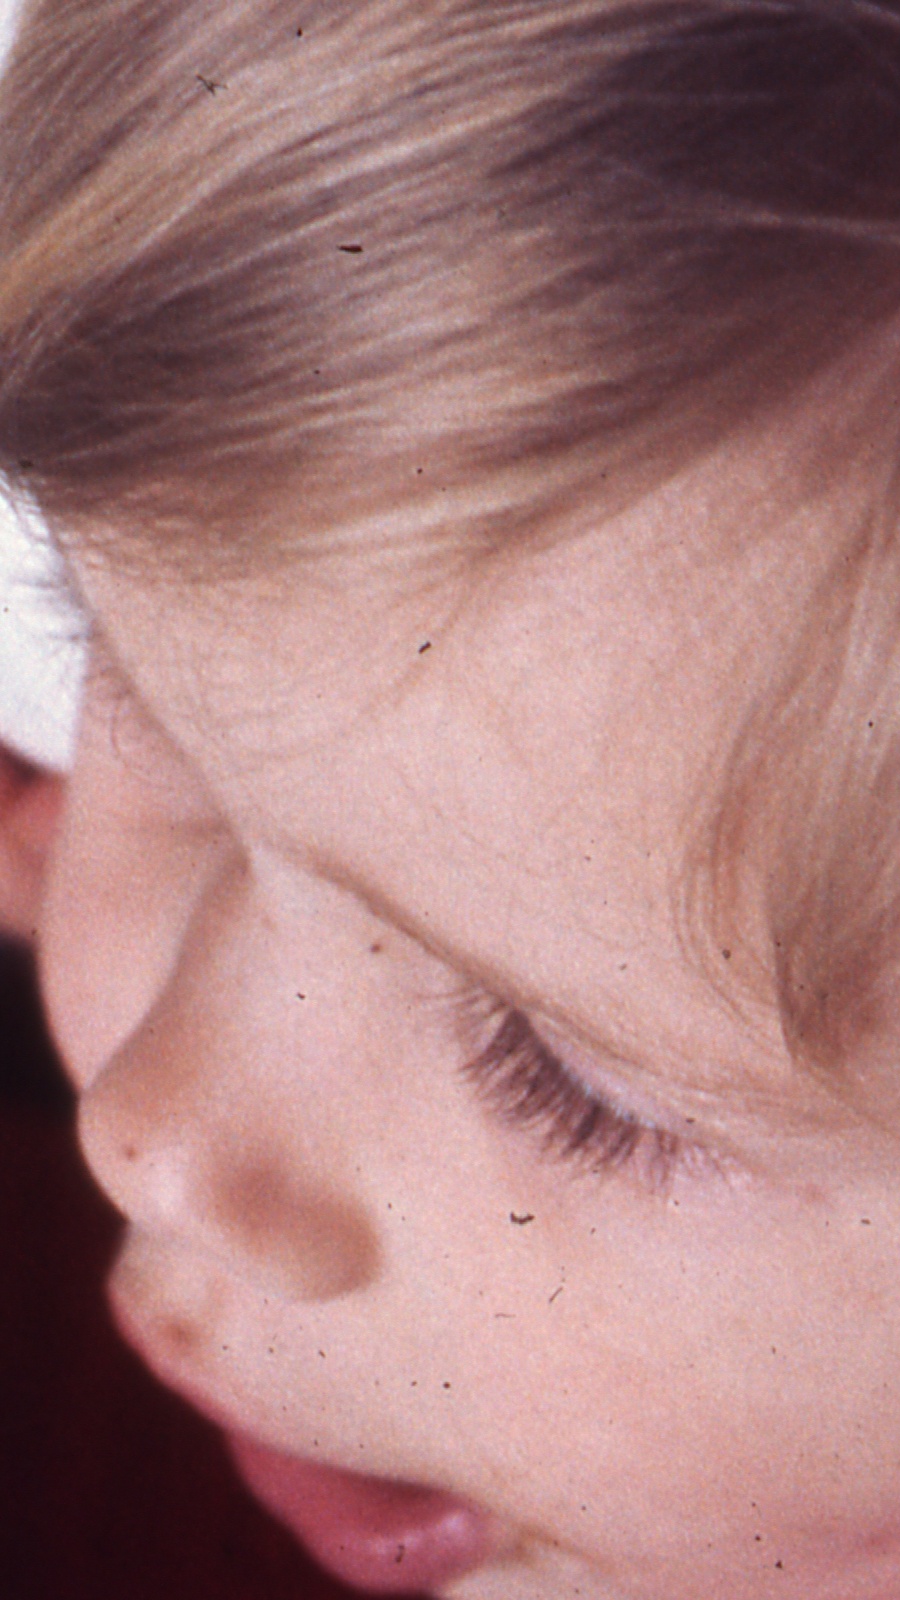
As you see, there's dust all over the place. Here's the same crop from a scan using Digital ICE:

What's even more amazing is that it's algorithm's decided that a couple of the spots were freckles, not dust and didn't remove them. As for being softer, decide for yourself; it may be a little softer, but not much and I'd hate to try to remove all the dust by hand.
One thing I've discovered is that some of the images I'm scanning have a lot of noise. Not sure if it was there originally or is something that happened over time. Most of the time I can greatly improve these images using the Imagenomic Noiseware Professional Photoshop Plug-In. I highly recommend it. This image didn't really need it, but here's what the same crop looks like after running it:

I did NOT use the Color Restoration adjustment on the images above with the vent hose ... it's pretty obvious from the previews when you need it and when you don't ... if you don't need it, the colors of resulting scan will be worse.
Here's another example of a image that has somehow collected lots of dirt:
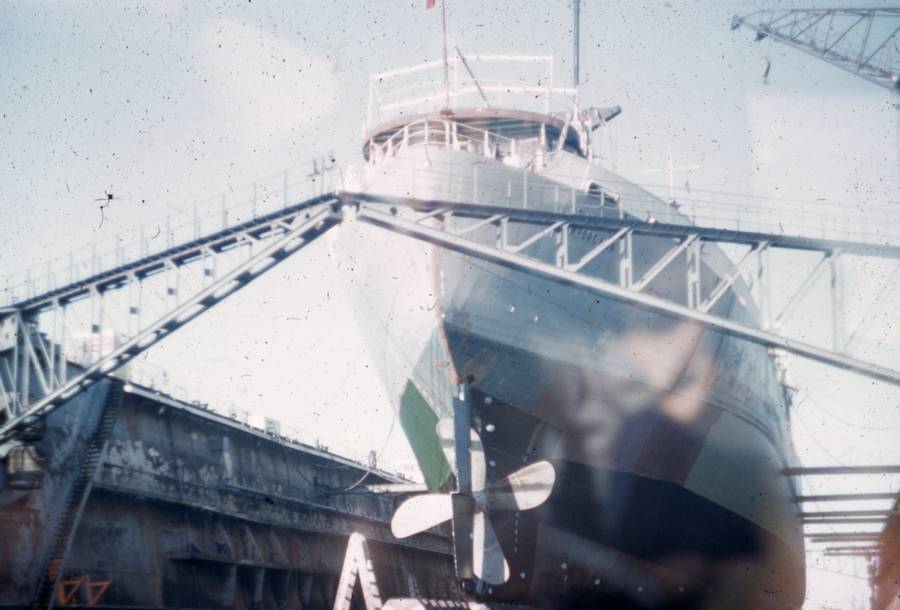
Here's a crop showing the result of a scan without any adjustments:
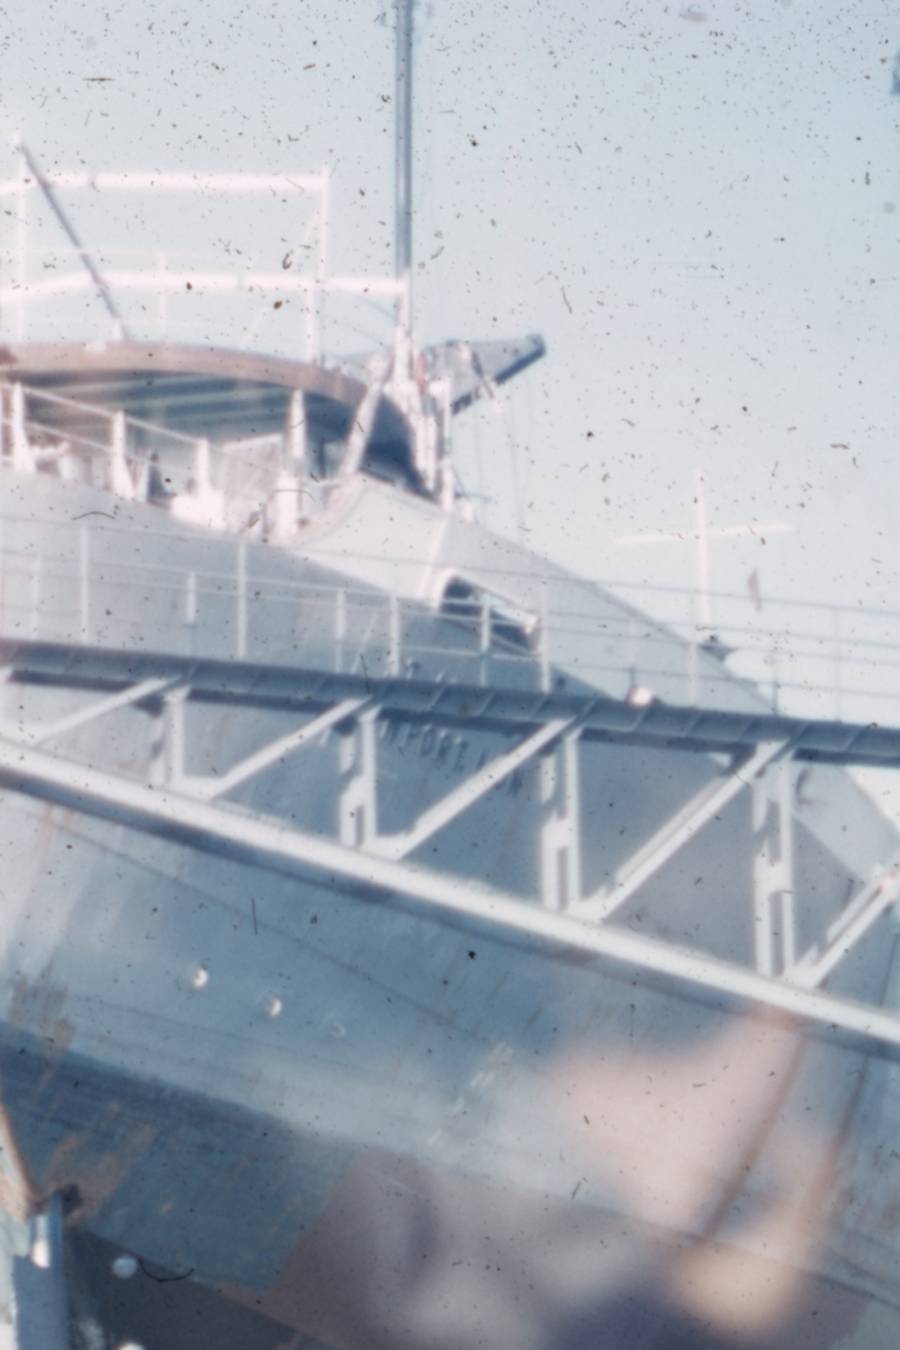
And here's the same crop from a scan cleaned using Digital ICE:

It's pretty amazing isn't it? How long would it take you to do that manually? Sure, most of your images may not be that dirty, but I decided that since I was going to walk away during the scan process, who cares if it takes longer, I would just use Digital ICE on every scan.
One other thing I don't understand at all. The first batch of slides I scanned that were stored in a plastic sheet (the kind that hold 20 slides on an 8.5 x 11 sheet that you can view by holding up to light) looked they were shot at ASA 6400 (since they're old slides I'll say ASA instead of ISO). Nothing I can do gets rid of the noise. Thought all my slides stored in these sheets were ruined. However, the next several sheets I've scanned are fine and none of the slides stored in boxes are a problem. Will report back when, if, I figure out what happened.
Update: I just scanned another sheet of slides with the same problem. What's interesting is that they were probably taken around the same time. Looks like they were all taken indoors with available light. At the time I was using a lab in Cambridge ... wonder if I under exposed them all and asked the lab to push them a couple of stops. Where is the EXIF data when you need it? The noise is TERRIBLE, I would never consider it acceptable now. We're so spoiled that we can experiment without cost. We learn from our mistakes. What amazes me as I look at these old images it how much we improve ... there are almost none (not just these) I would consider a keeper now.
Update 2: I continue to find both slides and negatives that have this problem ... I can't really find a common denominator.
This scanner allows you to scan 12 slides at once, or up to 24 negatives (if they're cut in strips of 6, most of mine are strips of 4 or 5, so 16 or 20 at once). If you do use the Digital ICE you can just walk away and let it to its thing. When you come back 12-24 images have been scanned, automatically named using a template you specify, and put in a folder of your choosing. Pretty nice!
The V750 scanner is one of a series of three scanners from Epson. The V500 is around $300, the V700 under $500, and the V750 under $700. It's not entirely obvious what the difference between the 700 and 750 are. The HELP file says Digital ICE doesn't work in as many modes on the lower priced scanners, but I'm not sure if they are talking about just the 500 or the 700 as well. I finally decided to go with the 750 because it is newer than the 700 and I figured if I was spending that much I should go for the "Professional" version.
Once again I'm very pleased with the Epson TWAIN interface. Fifteen years ago HP made the best scanners, so when I needed a new scanner 9 years ago I just bought I just bought the best HP scanner I found in the store ... I did no research. Was never very happy with it. Didn't understand why until about 7 years ago I had to replace the scanner I had up north ... this time I did my research and choose Epson. I don't think the scanner was any better, but the software interface (TWAIN) was MANY TIMES better. Think the Epson interfaces still are better, but admit I haven't tried a good Canon scanner, only newer scanners of other brands.
Suggested next choices:
ImagingTips.com Site Map
![]()
[an error occurred while processing this directive]