

There are many ways to personalize your computer. After all it's called a PERSONAL Computer, so you might as well make it look and work the way you want it to, you don't need to leave it looking like an advertisement for Microsoft or your computer manufacturer. Right-click anywhere there is a BLANK spot on the desktop and you'll see:
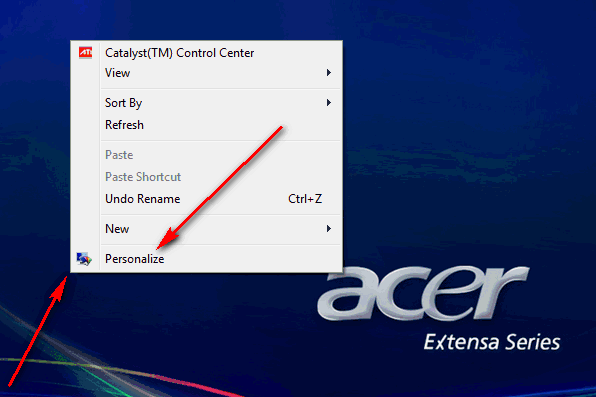
Choose Personalize and you'll get these choices:
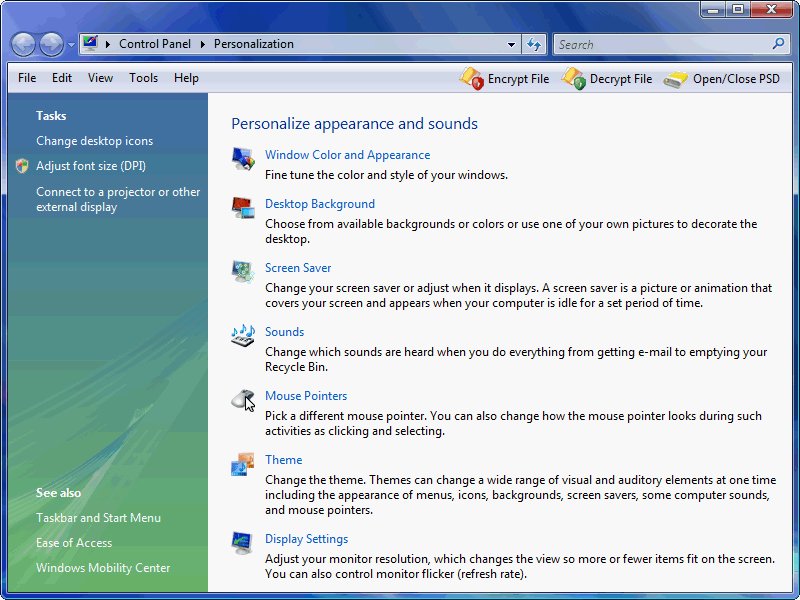
A good place to start is to choose "Desktop Background", which gets you this window:
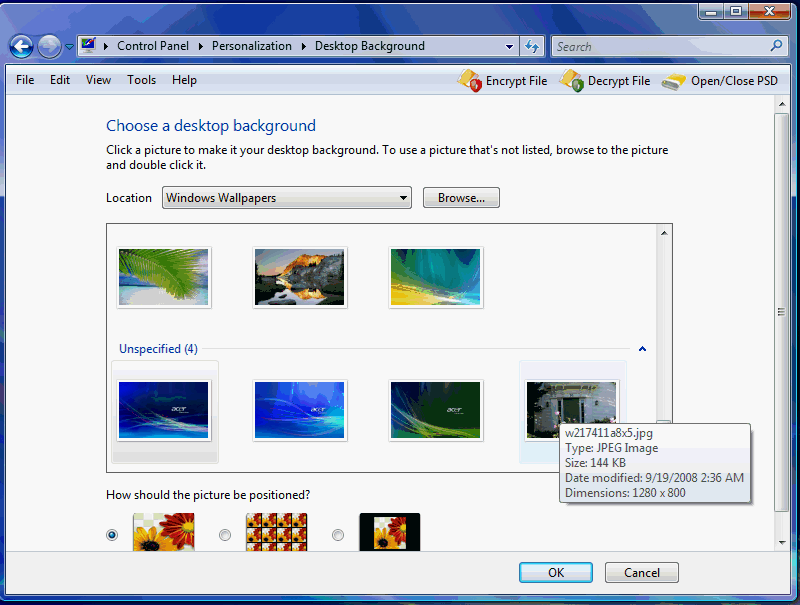
Another name that's been used for the desktop background is "Wallpaper". You can scroll up and down and pick one of the choices Microsoft has provided, use the pull-down to pick other image sources, or you can click on "Browse" and pick any image you have stored on your machine (usually you'll find them in your "Pictures" folder).
Once you've highlighted an image, choose how it should be positioned. The choice here (radio button on the left) causes the image to be resized to fit the screen (which may distort the image). If you have a small image I recommend the choice on the right which center the image on the screen.
I recommend you create a folder where you put wallpaper that you've cropped to the same aspect ratio as your computer screen. You might also want to resize it to the maximum resolution your monitor will support.
You'll notice that the image I highlighted above is one I took of the laptop owner's house. I cropped it to an aspect ratio of 8x5 and then resized it to 1280x800. I got tricky and put it in the same folder Windows keeps it wallpaper in ... that's why it shows up along with the Windows Wallpaper that Microsoft supplied. The Windows wallpapers are categorized, this image (along with the three that Acer put in the same folder) ends up in the "Unspecified" category.
The folder with the Windows wallpapers can be found under the "Windows" folder on your C drive:
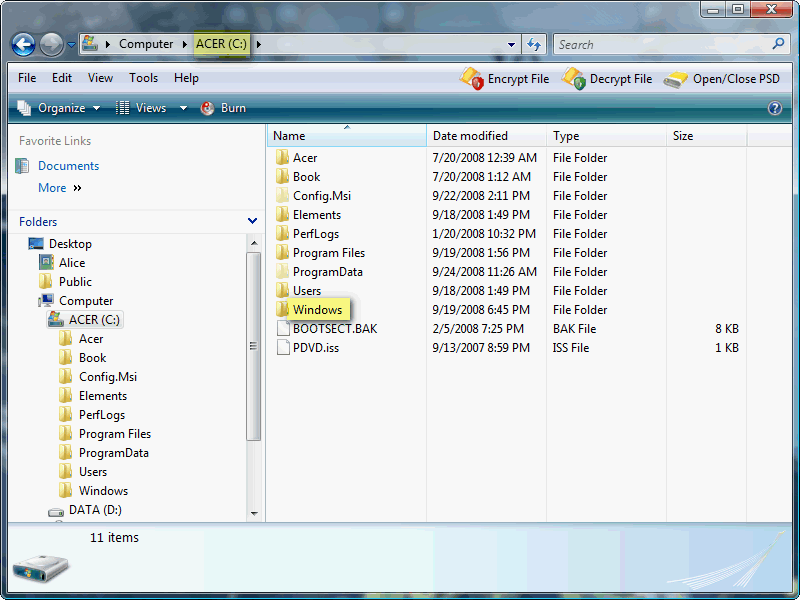
The very first time you try to look in your Windows folder the screen turns blue and there's a warning that you shouldn't be poking around in there. Ignore the warning and click where it says something to the effect of "Continue Anyway". Down near the bottom of the list of folders in the Windows folder (and there are LOTS of folders here) you'll find one named "Web":
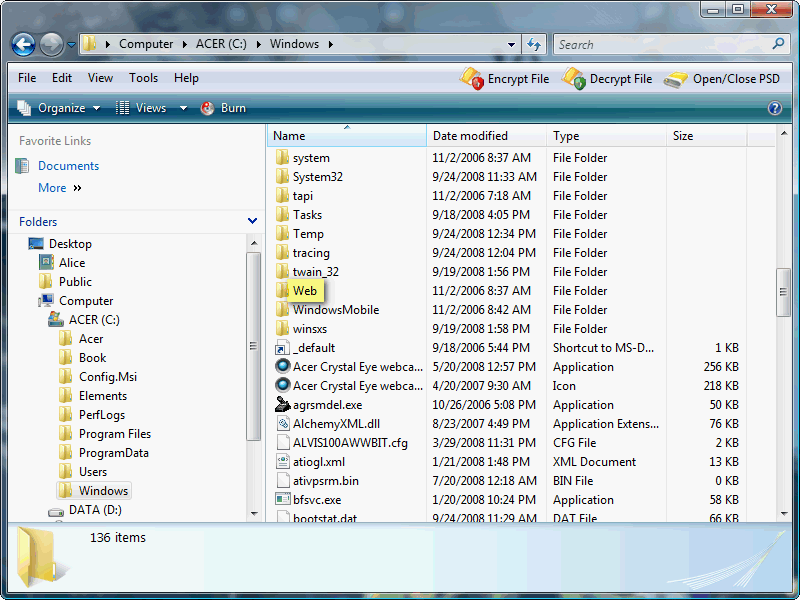
In that folder you'll find another folder name "Wallpaper":
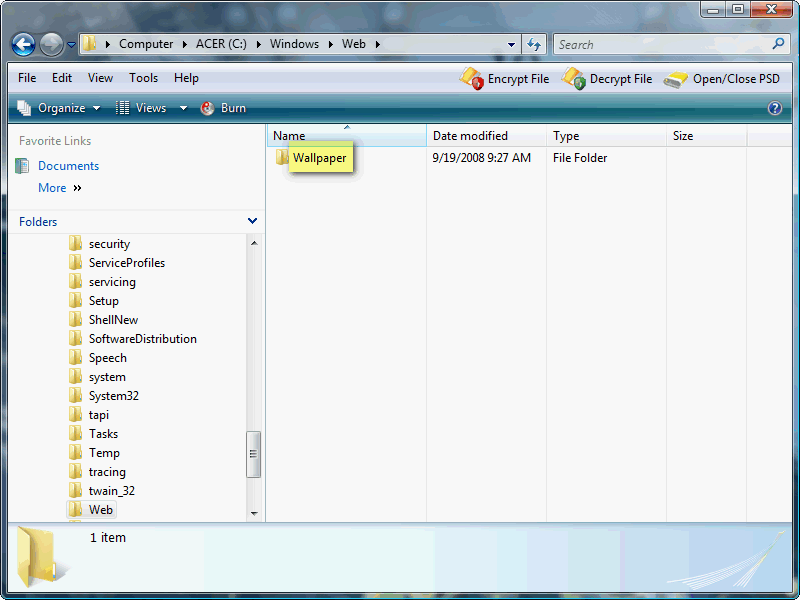
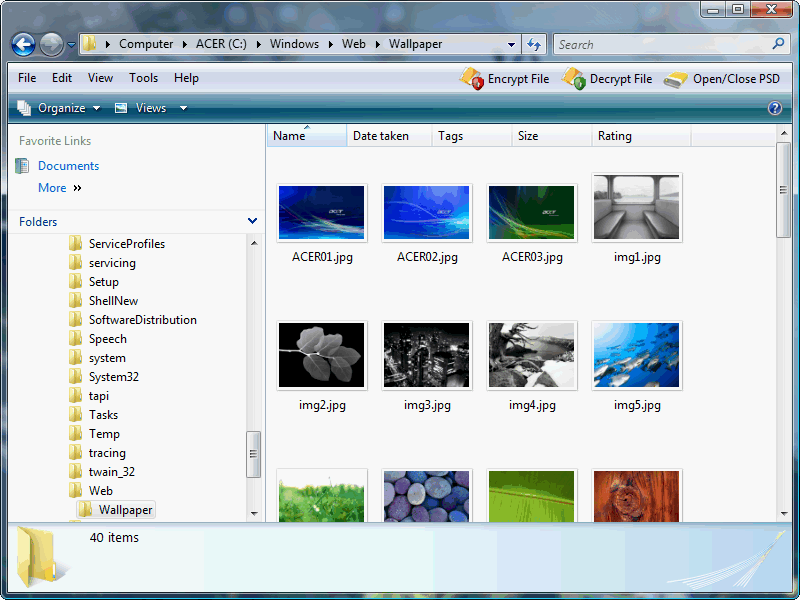
This is where you'll find the wallpaper that Microsoft supplied and where I sometimes add my own:
I got curious about how the categories were maintained, so poked around. As I highlighted an image you notice that at the bottom in the "details" section this image has been assigned a tag of "Vistas".
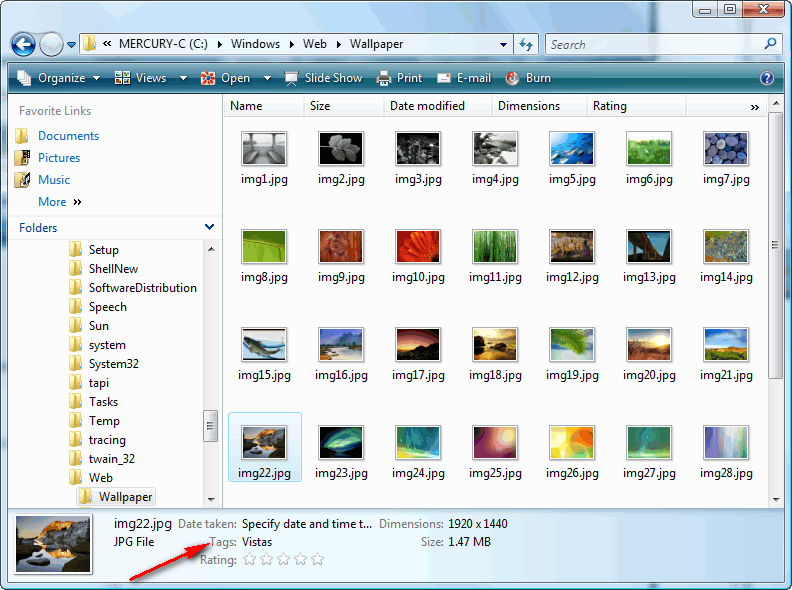
For more information see Keyword Tagging.
Screen Savers
This Acer laptop came configured to provide advertisements for Acer when the screen saver kicked in ... they annoyed me and had to go, choose "Screen Saver":
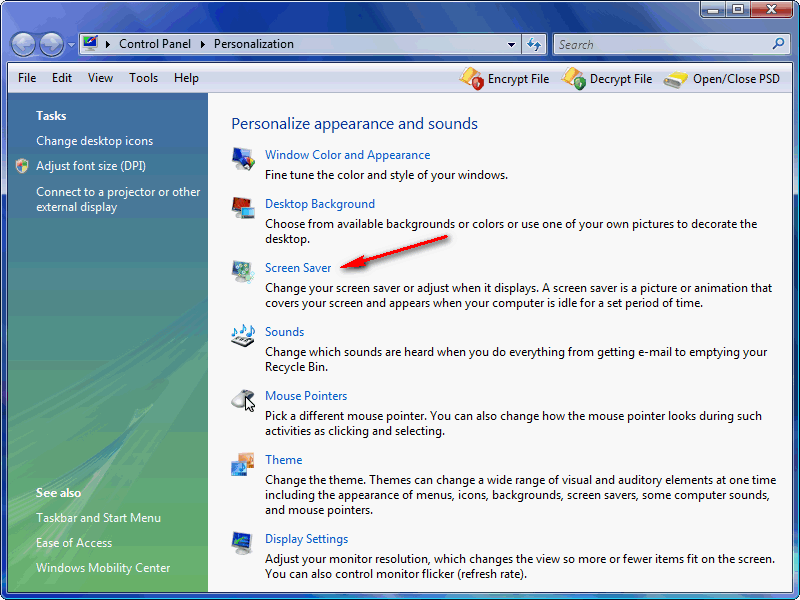
Then use the pull-down to choose another screen saver:
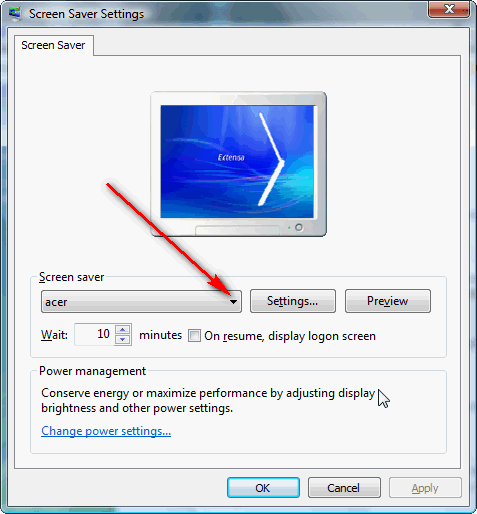
Since there were no personal pictures on this computer yet, I choose "Ribbons".
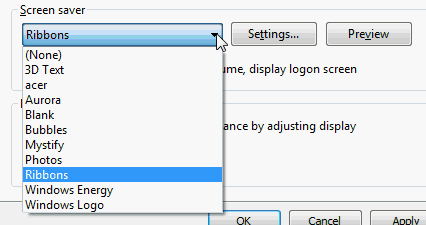
After you pick a screen saver, you see a thumbnail of the screen saver, but if you press the "Preview" button you'll see a quick full-screen preview.
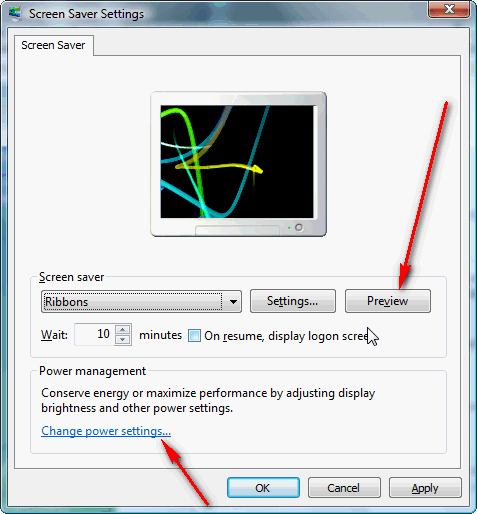
Once you have your own images on your computer, I recommend the "Photos" screen saver. Once you've selected it, be sure to click on "Settings" to specify where to find the photos, how long to display them and other details.
Also note the "Change power settings" button on the screen above. Clicking on it gets you to this screen:
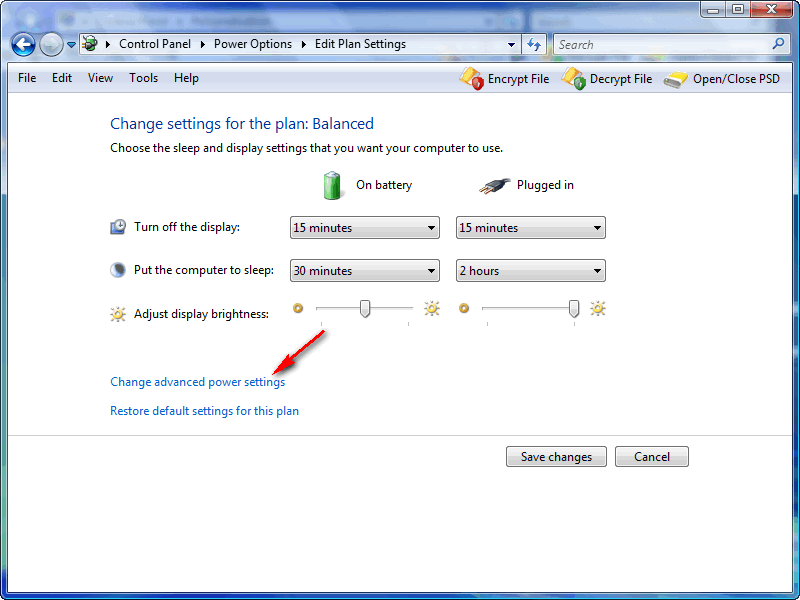
This is where you turn off the screen entirely, both to save power and to lengthen the life of the screen ... you'll probably want these times to be after when the screen saver kicks in. Because my machines are networked together, I never to put them to sleep (as long as they're not running on battery) so I can access their drives from other machines. Under "Change advanced power settings" is where you can really fine-tune your power settings, including when to spin-down hard drives, etc.
Other Settings
Before we leave personalization, lets look at a couple of other choices. First "Display Settings":
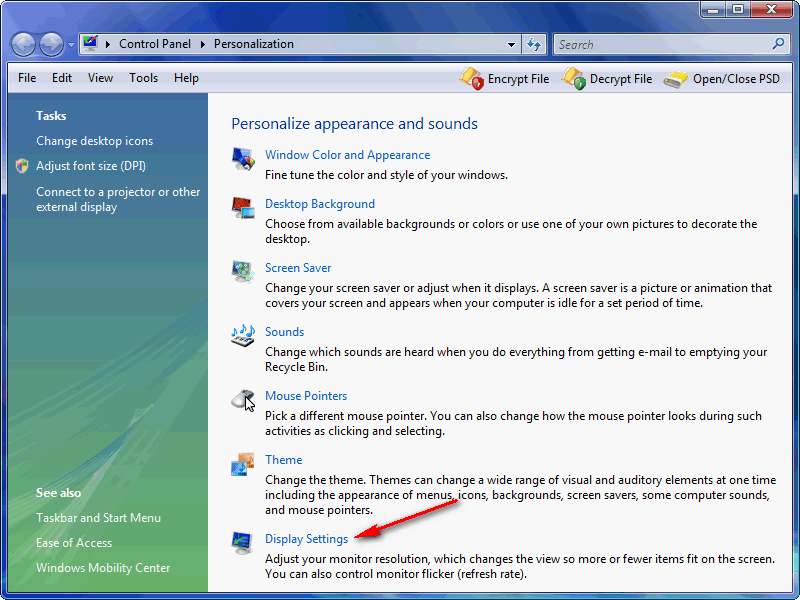
Here I basically recommend the highest resolution your computer supports (limited by your video card and you screen):
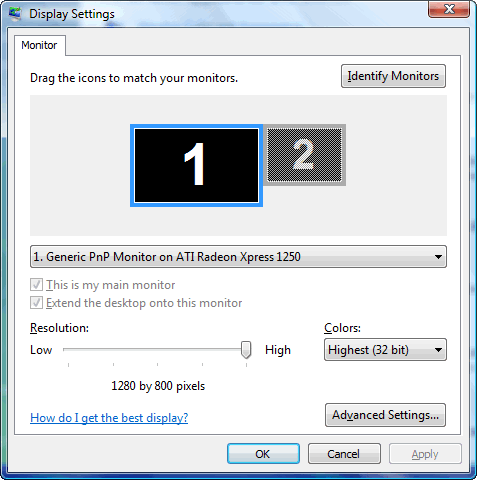
People choose lower resolutions because they have trouble reading text on the screen but there are many ways to deal with this problem. The highest resolution screen you computer will support is the absolute best choice for working with digital images ... why else are you here? Most programs (Firefox, Internet Explorer, Thunderbird, etc.) have ways to increase the size of type ... this is where you want to start. Try it for a few days! If you really have trouble seeing the text on your desktop, here are a couple of options:
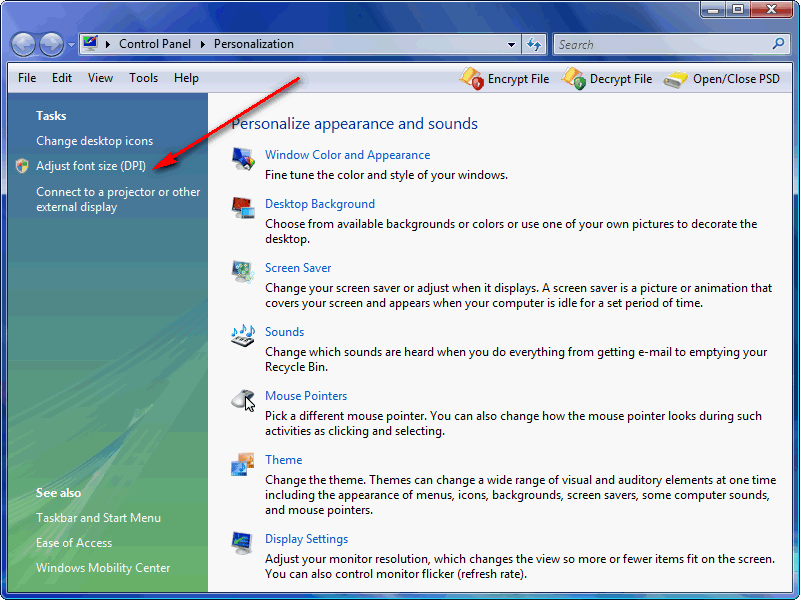
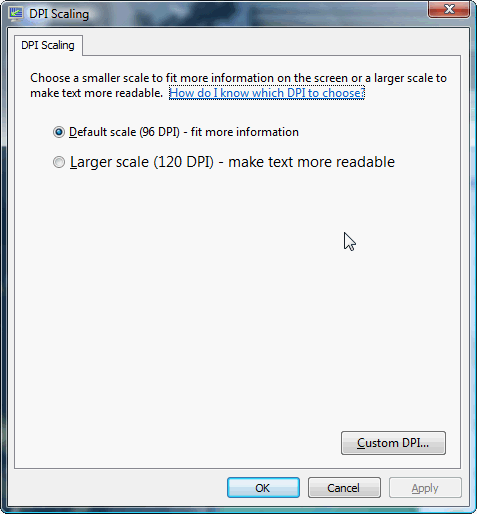
You can click on "Adjust font size" (above) and choose 120 DPI. Just beware that in some programs text may not be displayed correctly (it may be cut off or omitted), this can be very confusing ... you don't realize it is caused by this setting and instead blame the program.
Another option is to follow this path, which lets you fine tune individual items:
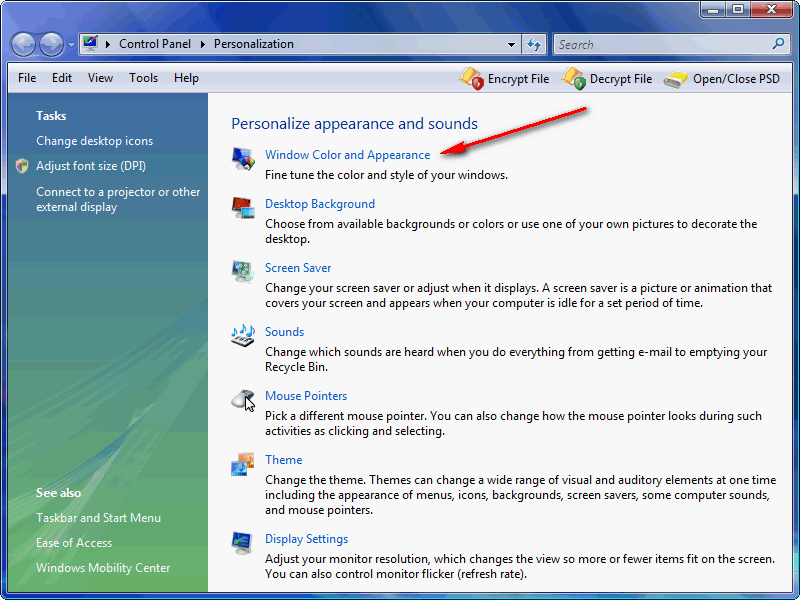
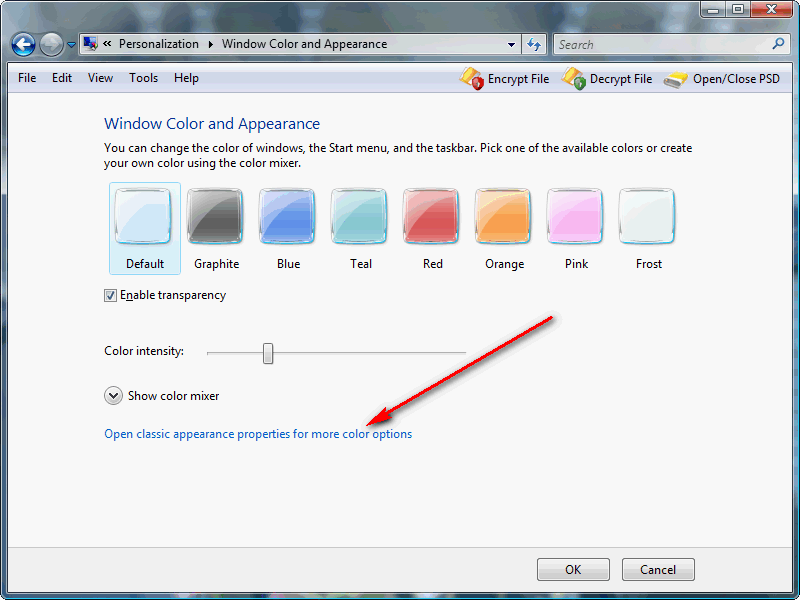
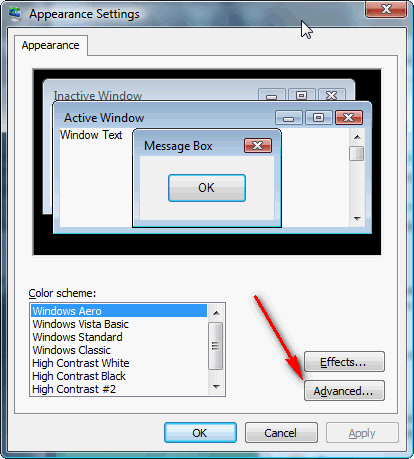
Here you can use the pull-down to choose individual items you want to customize:
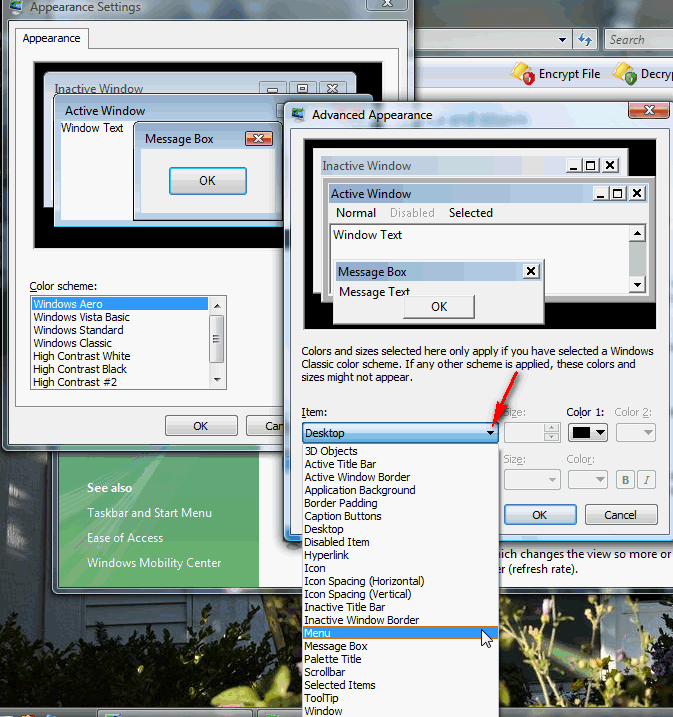
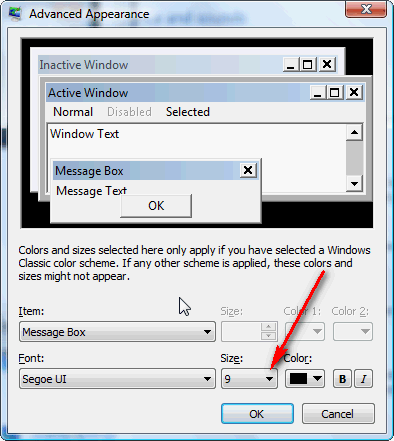
For many of them you can specify a font and a size, but again, be careful you can get yourself into the same problems.
Some day when you just want to have fun, play with the Theme, Mouse Pointers and Sounds settings:

Suggested next choices: