

(This is one of many pages of tips on Organizing Your Images.)
|
Shadow Files are the copies of files that Windows keeps so you can do a "Restore System" and hopefully return your system to way it behaved yesterday, a few days ago, or even weeks ago if you have room for enough shadow files. In normal operation, these files are not an issue. As you disk starts to fill up, older ones are deleted to provide room for actual, current data. The only time they become an issue when they get backed up too as part of a complete system backup. The more empty space you have on your C drive, the more shadow copies Windows keeps. I just did a backup today and my program backed up 180GB, it was good enough to compress it to 116GB but it took almost 6 hours. I got to wondering why I had so much on the drive. I added up the contents of all the folders and could only find 44GB. I knew there was another 7-8GB in hidden swap and hibernation files, but my backup program is smart enough to ignore those. Only thing I could figure was that maybe the shadows files (which I can't find) take up a HUGE amount of space. Used Google to discover how to delete all but the most recent set of shadow files and presto, I was down to 50GB. That's a savings of 130GB! Windows 7 update (4/2012): By default Windows 7 sets a maximum amount of space for shadow files which helps. It also has a easy way to delete ALL the shadow files without turning protection off as described below. (The problem with turning it off is that it's too easy to forget to turn back on.) Go to system protection (right-click on Computer, choose Properties, then choose "System Protection" in the upper left, see screen shot far below). You should see:
Select your System drive which is almost always drive C. Click on "Configure". You will then see:
All you need to do is click the "Delete" button. How easy is that? Windows keeps getting easier to use, you just have to know where to go. Also note the slider above. It controls how much of the drive can be used by system protection to store shadow files. Depending on the size of your drive I recommend a minimum of 10-12GB and a maximum of 40-50GB. Here's another technique: Start "Disk Cleanup", you'll either find it in under "All Programs" in the "System Tools" folder (under "Accessories" on my machine):
Or at the very bottom of the Start Menu, you can just type the word "clean":
and programs any programs with "clean" in their name appear at the top of the menu: (Of course you'll also see every file with the word clean in it's name or in the text inside the file.)
|
Sponsored Advertisements:
Sponsored Advertisements: Sponsored Advertisements: |
By the way, a couple days ago I couldn't find the standard search menu (with it's advanced search options) it had disappeared from the right side of the Start Menu. Just now I noticed that all the programs that were in the Administrative Tools folder (except one) have disappeared. Seems like Microsoft in its continuing effort to make things look simple, only make it harder for us to find things. Research showed that the one way to get the Standard Search back was to remove either Help or Run (not a helpful solution) ... instead you now have to know to use F3 to get to the Standard Search menu. Search was removed when Vista SP1 was installed, I'm guessing that's when everything disappeared from the Administrative Tools menu too ... typing the name in the Quick Search box seems to be the answer.
The first menu asks which disk to cleanup; C if you want to remove shadow files:
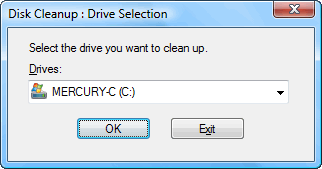
You can scroll through a list of things to cleanup and check ones you want to delete. (For example, "Temporary Internet Files" are a good thing to delete before a complete system backup ... no sense in backing them up.) But, since we're trying to delete the shadow file, choose the "More Options" tab:
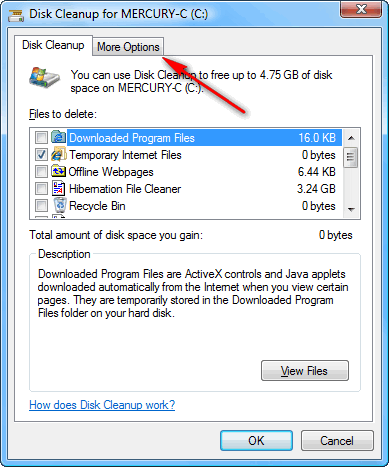
Next choose the "Clean up" button under "System Restore and Shadow Copies":
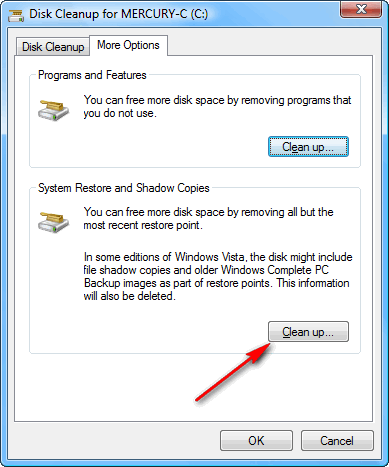
It gives you one last warning, but if you then press delete they're gone. 130GB in my case, THREE TIMES as much junk as all the useful programs and data on my entire drive.
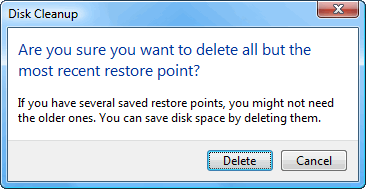
Update: I've noticed that on some machines when I do this it doesn't REALLY delete the shadow copies. You can tell when this happens because the delete is instant ... when it really does something, you here the disk rattle for at least several seconds. Another clue is that you gain no free space on the drive. You can verify that your shadow copies are gone by starting to do a "System Restore" (see below) and see how many choices you have. Be sure to stop at this point, don't actually restore. When the delete fails, the only work-around I've found is to turn off system protection (directions follow) and then turn it back on again. After turning off system protection, and then back on, be sure to verify a few days later that it is really on ... you need to wait a few days so you can see that it has created multiple check-points.
Here's another option if you REALLY want to minimize the size of your complete system backup. Right-click on "Computer" and choose "Properties" OR choose "System" on the control panel (click on "System and Maintenance" first if you don't use the "Classic View"). Either way you get this menu:
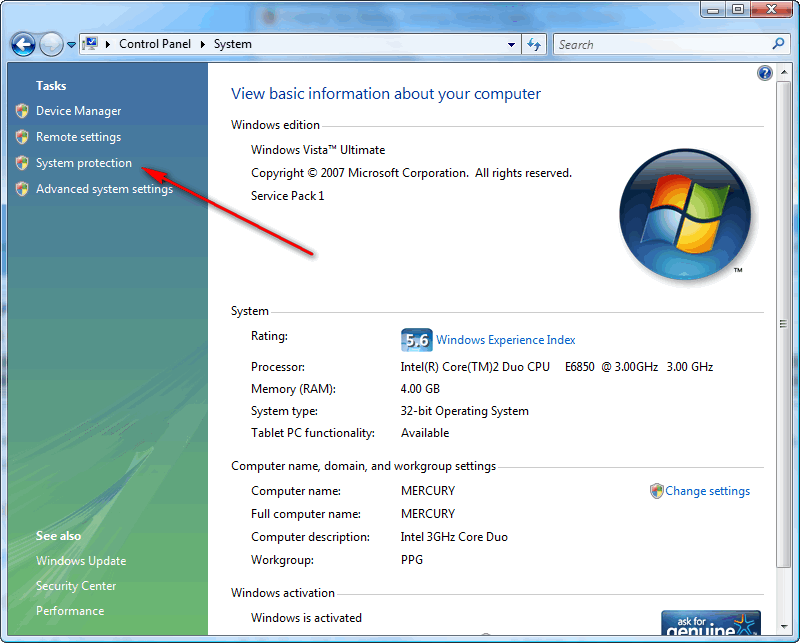
Click on "System Protection" (arrow above), the un-check the box (arrow below) next to your System drive (usually drive C):
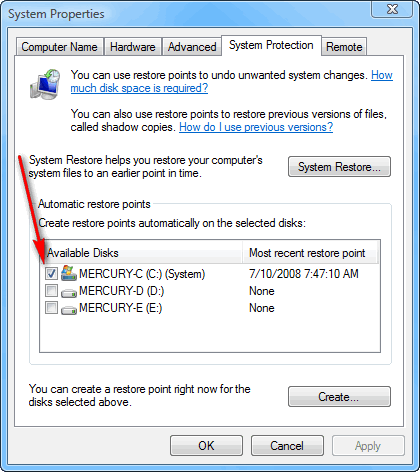
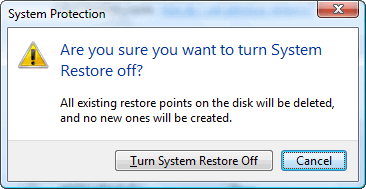
You'll get this, warning. Press "Turn System Restore Off":
Once you're back to this menu and press "Apply", you should see "None" as the most recent restore point:
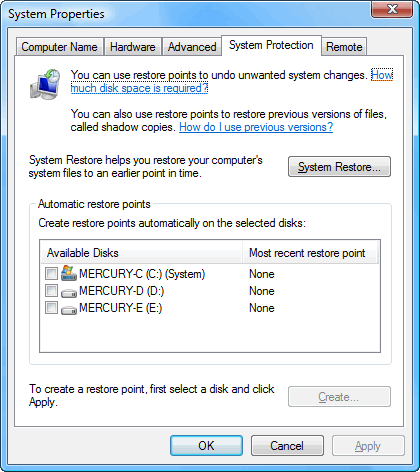
After making your complete system backup, be sure to turn System Restore back on. Come back to this menu and put a check next to drive C (or whatever your System drive is):
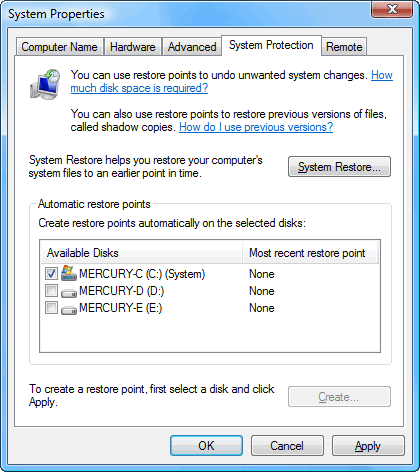
You'll notice that I ONLY use System Restore for my System drive. Once you've put a check next to the System disk and press "Apply", the Create button becomes available. Press it. You'll get this menu where you fill in some kind of name for the restore point you're creating:
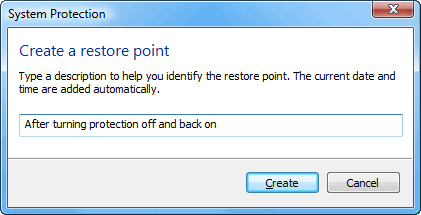
Press "Create" again; it takes less than a minute to create a restore point.
Creating a restore point is a good thing to do before installing new software.
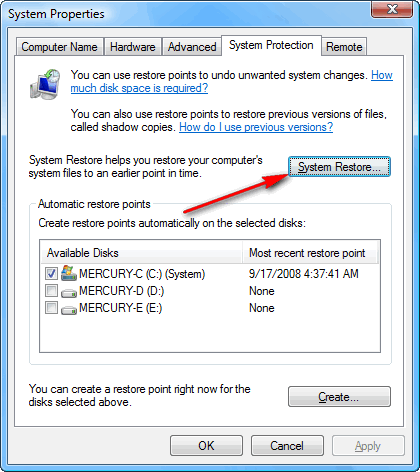
I recommend checking this menu frequently to make sure System Restore is turned on. If you want to see how many restore points you have, click on the "System Restore" button. You can cancel after it shows you your options.
Windows Update automatically creates restore points (unless you've been foolish and left system restore turned off). Be careful, it may say it creating a restore point, but it won't if system restore is off.
Personally, I keep Automatic Windows Update turned off and make a complete system backup before doing the update. If you keep updates turned off, be sure to check for updates about once a month. (If you turn off automatic update, or "User Account Control" which is REALLY annoying and I turn off immediately, it will keep warning you when you boot that your system isn't protected. If you close the box enough times, it might decide you really don't want them turned on and stop annoying you.![]()
One thing that is easy to do and can get you into real trouble is failing to successfully turn System Protection back on. My advice is to check your system every month (and especially a few days after turning system protection on and off) to make sure you have multiple restore points.
First go to "System Protection", see above, and click on "System Restore":
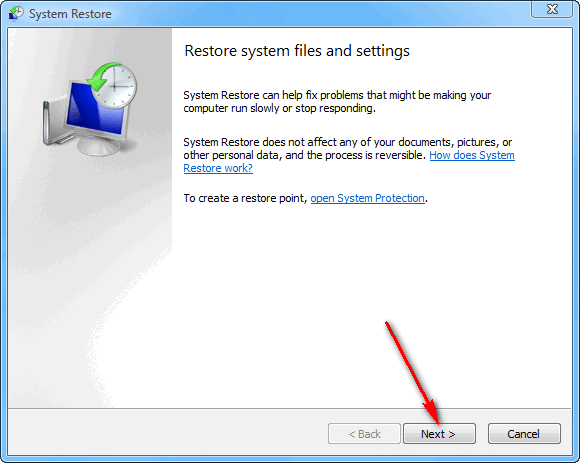
Click Next:
Make sure there are some recent restore points (there should be one most days your system was turned on). Check the box (red arrow) to verify how many older restore points you have:
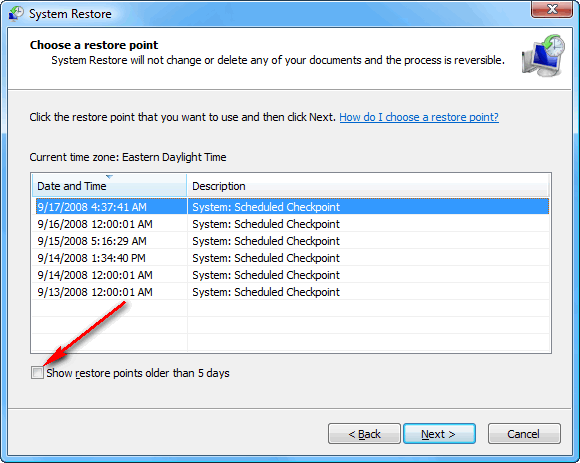
Scroll down and verify how far back they go:
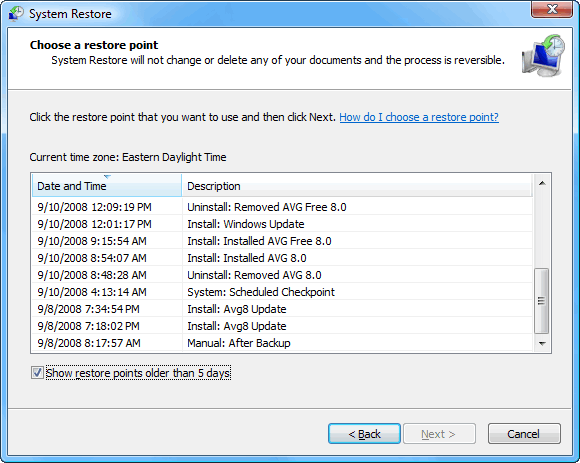
Be sure to cancel at this point, this was just a test; we were just checking!
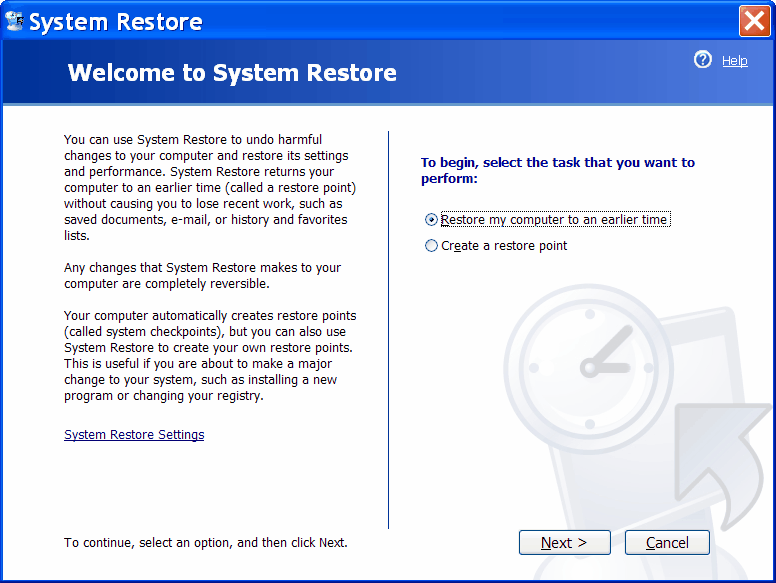
In XP the System Restore screens look like this:
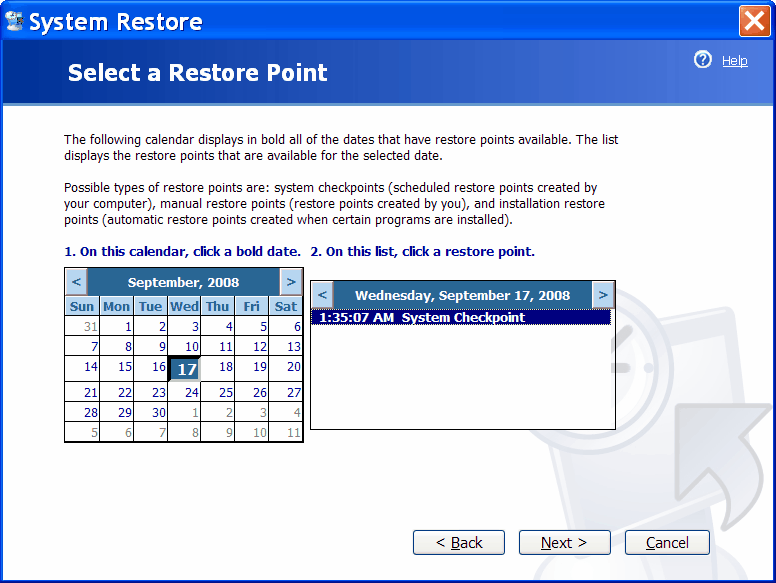
If you click "Next" you get this screen which shows you a calendar with restore points indicated in bold. As you click on each date you'll see the potential restore points on that date. This machine has only one restore point, on the 17th:
Suggested next choices: