

(This is one of many pages of tips on Organizing Your Images.)
|
Network drives are easy to use. Don't be afraid of them. If you have two or more computers you probably have a wireless (or wired) router so they can all connect to the internet. And if your computers are connected to the router, they're all part of your local network. (Even on dial-up, my computers are connected to my router so they can share drives, even if they can't access the internet.) The concept is really simple:
To share a drive, open "Computer" (or "My Computer" in XP) and right-click on the drive to share and choose "Share". (Drives that are already shared have two little people (arrows below) under them in Vista, or a little hand under them in XP):
You'll get the Sharing tab of the drive's Properties. Press the "Advanced Sharing" button (arrow).
Next check the "Share this Folder" box (top arrow below). It will fill in a share name, usually the drive letter (yellow highlight) on this machine which is what you want, if it doesn't change it; here we're sharing local drive F:
Next press "Permissions" (bottom arrow above) and you'll get this menu:
We're not trying to protect the drive, we're trying to let our other machines use the drive. Therefore, check all boxes in the allow column; we want "everyone" to have full-control. If for some reason more groups are defined on your machine you'll have to make these changes for all of them.
Press OK (usually when a menu has both Apply and OK buttons, pressing just OK will both apply the changes and close the menu). That takes you back to the first menu, where you'll also see a Caching option:
I just leave it set to the default, but if I were making a choice I would choose the last option. Offline access will only use up storage space on your own system and lead to confusion.
|
Sponsored Advertisements:
Sponsored Advertisements: Sponsored Advertisements: |
Once you press Apply on the "Advanced Sharing" menu above, the Shared icon (arrow below) appears in the "Computer" window:
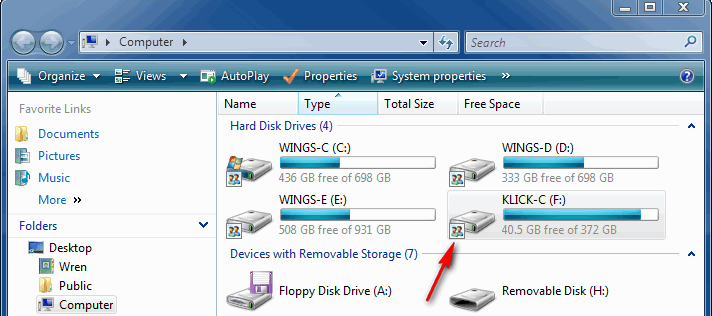
You'll note that I name my drives with the computer's name and the local drive letter. (Although the drive we just shared is drive F on this system, it's really the C drive from another system that I have mounted on this machine for the summer.) To change the name of a drive (also known as it's Volume Label) right-click on it and choose "Rename".
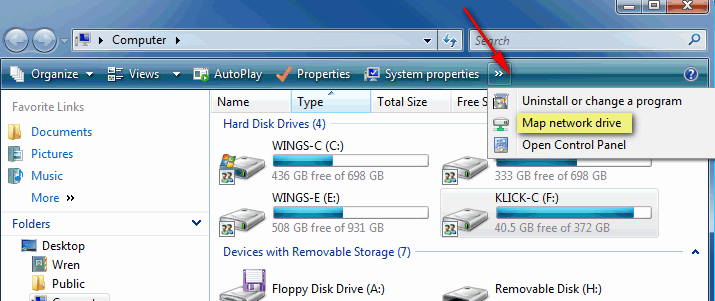
Normally you'll see the "Mount Network Drive" choice to the right of where the arrow below is pointing. If the window is narrow (as here) and there isn't room for it, click on ">>" (arrow) and choose that option. (In XP you'll find "Mount Network Drive" under "Tools" on the "My Computer" menu.)
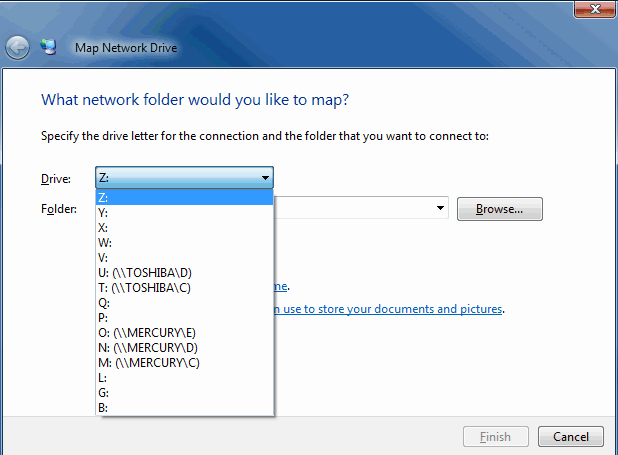
You'll get the menu below. The top pull-down (Drive) shows you the letter choices you have for mounting the drive. It also shows network drives that are already mounted and their associated letters. Choose a letter that will always make sense to you for this drive. Here I'm mounting a drive on a machine named "JAZZ", so I'll pick Z.
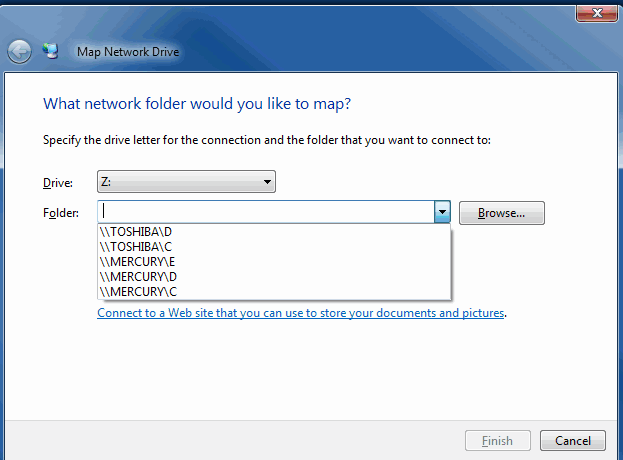
The bottom pull-down shows a list of drives you've mount on the machine in the past. Since I've never mounted this drive I can use "Browse" or type in the name.
Turns out that on this machine I have turned off "Network Discovery" (saves resources and allows the system to boot faster), so I get this error when I press "Browse":

Not a problem, as you saw from the list of past mounts, just type a couple of backslashes, the name of the remote computer, a backslash, and the drive letter on that machine. (I recommend fairly short names with all capitol letters for computer names ... some older versions of Windows occasionally got confused by upper and lower case names.
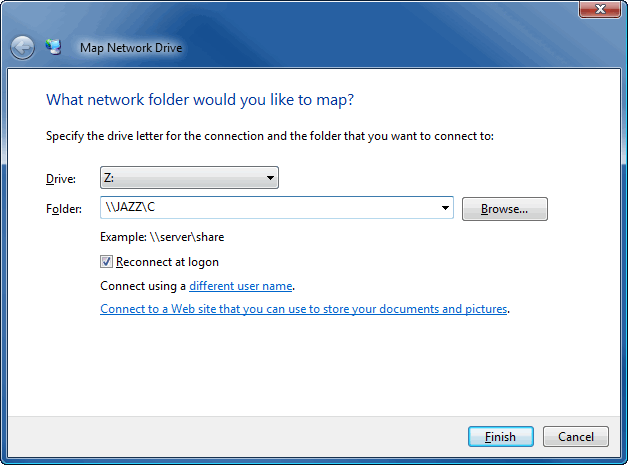
You'll normally check the "Reconnect at Logon" box (above), so the mount happens automatically in the future. Once you click "Finish" it will mount the drive and open another window showing the contents the share-point (the top level of the drive if you share the entire drive as shown above). If you look back at the "Computer" window ("My Computer" on XP) you'll see the new drive appear (bottom right below).
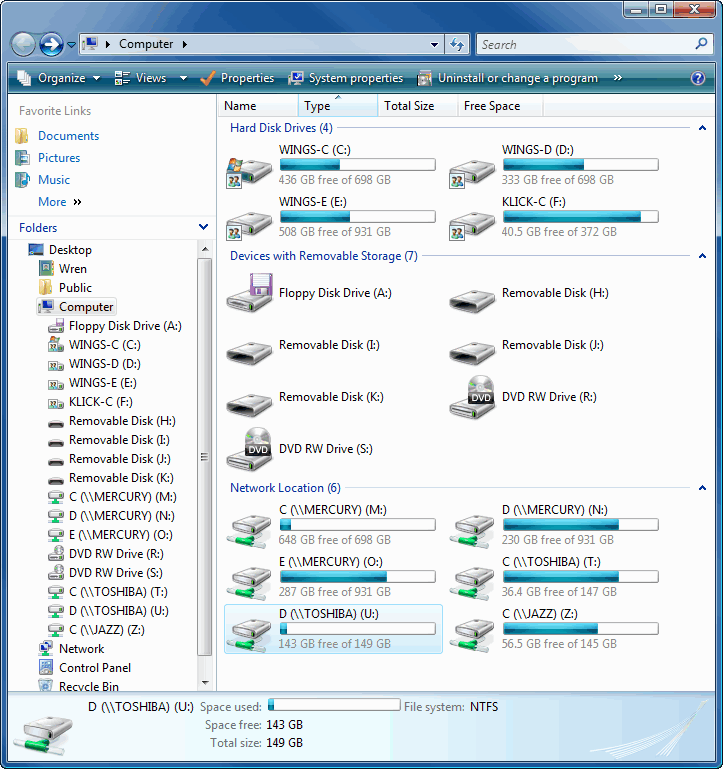
You'll notice that Vista shows you visually the amount of space used on each drive (the blue bars) and the amount free in GBs below the bars. When any drive starts to get full, the blue bar turns red. You'll also note in the screen shot at the very top of this page that my laptop was not turned on at the time and red X's appear on those drives. By the time the screen capture just above was taken, the laptop was back on.
If a remote machine whose drives are normally mounted on your machine is off when you logon, the drives won't get mounted. If the attempt to access from another program (like SyncToy) fails, just come back to the "(My) Computer" menu and double click on the red X. That will force another mount attempt.
Let me know other problems you encounter and we'll add them here with the solutions.
Suggested next choices: