
by Wren McMains
|
Sponsored Advertisements:
|
|
Review Copy JPGs
Advantages:
|
RAW files
Advantages:
|
|
Disadvantages:
|
Disadvantages:
|
|
FastStone Image Viewer
Advantages:
|
Bridge CS3
Advantages:
|
|
Disadvantages:
|
Disadvantages:
|
Personally I like viewing my images full-screen. Even with a huge monitor, where I can have big windows, full-screen mode hides everything else and let's one concentrate on the image. With two monitors, both FastStone and Bridge will allow you to preview images full-screen on the second monitor, but there's effort involved each time you use Bridge to set this up (see Bridge: Using Dual Monitors. Setting up dual-monitors is a quick one-time operation in FastStone. Personally, even with two monitors I like to use FastStone in the single-monitor mode and instead use it's full-screen view.
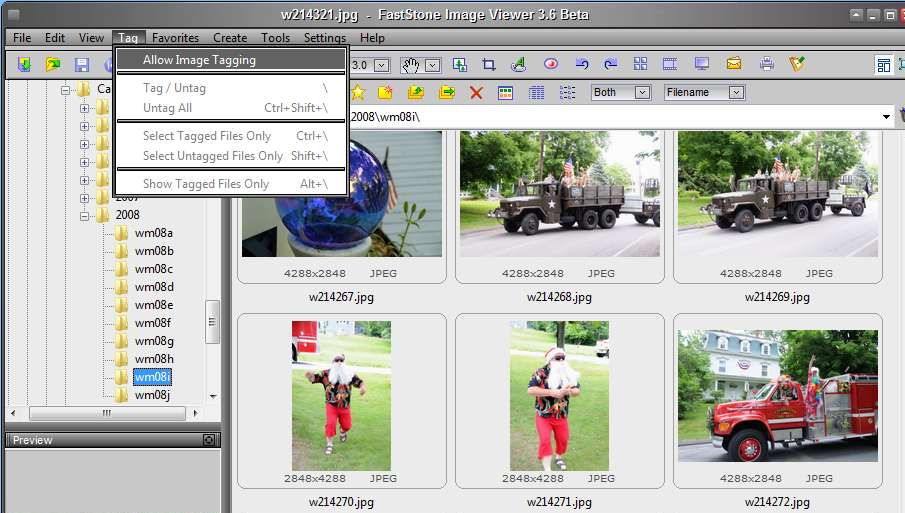
Therefore, I tend to review my Review Copy JPGs using FastStone. Two reasons: faster and often (especially if I'm just going to put the images on a web page) I'll just use the JPG without going back to the RAW file. Here's an example of tagging JPG files in FastStone (but you can also tag RAW files in exactly the same manner). By default, FastStone has image tagging turned off; to turn it on choose "Allow Image Tagging":
Once you do, little check boxes (red arrows below) appear under the thumbnails that weren't there before (see above):
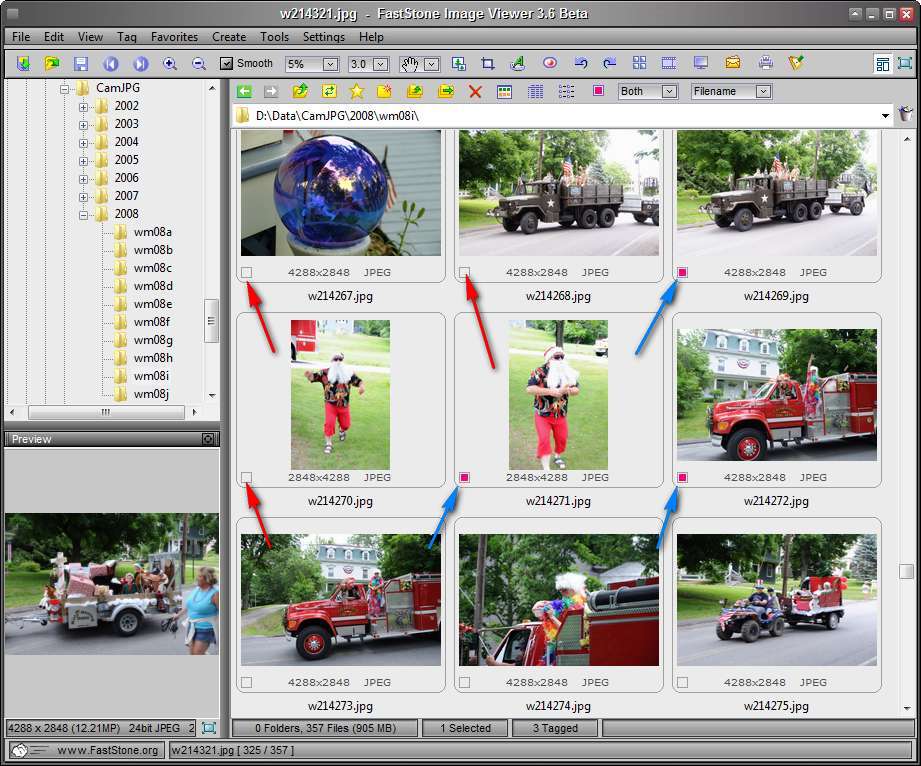
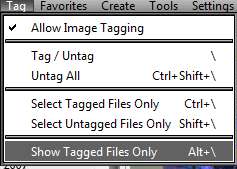
You can tag images by clicking on these boxes, or in full-screen mode use the back-slash key to turn the tag on/off (also works when thumbnails are selected). The blue arrows above show tagged images. You can choose "Select Tagged Files Only", or "Show Tagged Files Only":
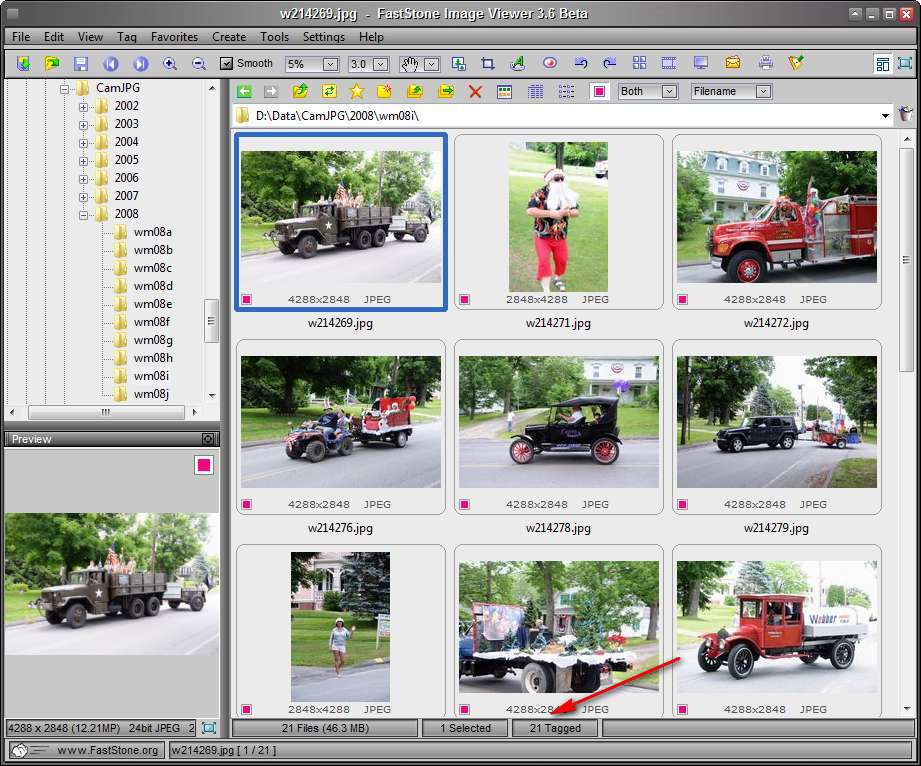
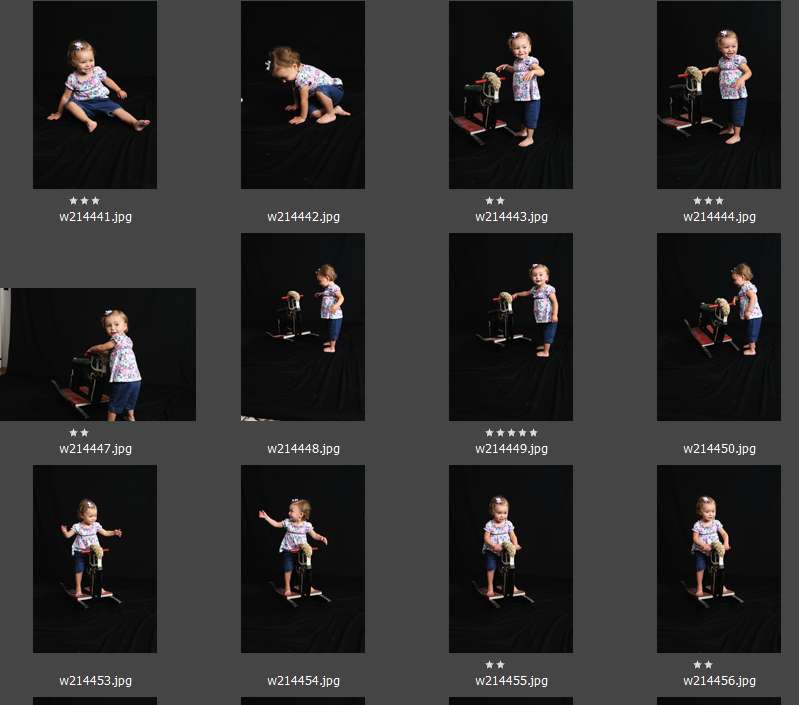
I usually choose to show them so I can review them full-screen. As you can see here, I've gone ahead and tagged some additional files. The total tagged is shown at the bottom (red arrow below):
The next step is to COPY them to a Subject Folder. You can either jump ahead to that page, or continue on this page to learn about star ratings in Bridge and Windows Explorer, and how I use FastStone to identify good, better, and best images from a portrait shoot without multi-level (star) ratings.
Now let's consider images taken in the studio; I want the customer to review all the images shot and pick the ones they like. Sometimes I'll have them review the RAW files using FastStone. But if I can find something to keep them amused for a few minutes while I download and batch convert the images to JPG I find the review process more pleasant because there are no delays during the review. (With RAW files FastStone takes longer to display them, especially on my laptop which has a slower processor and hard-drive, and I typically have them review images on my laptop.)
Batch conversion time depends on the speed of your computer and the options you've chosen for the conversion. Say you can convert 10 images per minute. That means if you shoot 100 images in the sitting you need to amuse them for a little over 12 minutes. 2-3 minutes to download and keyword tag the images (my 12MB images download at about 1 per second) and 10 minutes for the batch conversion.
I'm sure you can find many ways to amuse them; maybe they'll need to change back to street clothes. Then let them look at a portfolio showing different ways you have printed images in the past, so they can get ideas about what they would like. Be sure to include the prices and various "package deals" in the back of the book. Get them thinking about saving money (by spending more ![]() ).
).
Next question is how do I let them choose which images are good, better, best, and their absolute favorites when FastStone doesn't yet support star ratings? Here's what I do:
I've used the same process described above to let the tag RAW images in FastStone. However, because rendering an image from the RAW file takes longer, the model would think they did something wrong and try again to change to the next image; this would only cause more problems. They would quickly get frustrated, and I would have to "drive". And since the raw files are 10 times bigger, it would take 10 times as long to copy the images to the "good" folder.
If you are going to try this with RAW files, I recommend downloading from your Camera card first. The images will have your naming convention (really important if your names don't include the original number from the camera) and reading from and making copies to your hard-drive will (probably) be faster than accessing your camera card via USB or Firewire.
Once the customer has chosen the images they want printed, they'll leave, and I'll start the retouching process. But of course the issue with the process I recommend is they have selected Review Copy JPGs; I want to work with the RAW files. What do I do now? See the section in "Copy to Subject Folders" (the next page) labelled Create PSD version in Subject Folders.
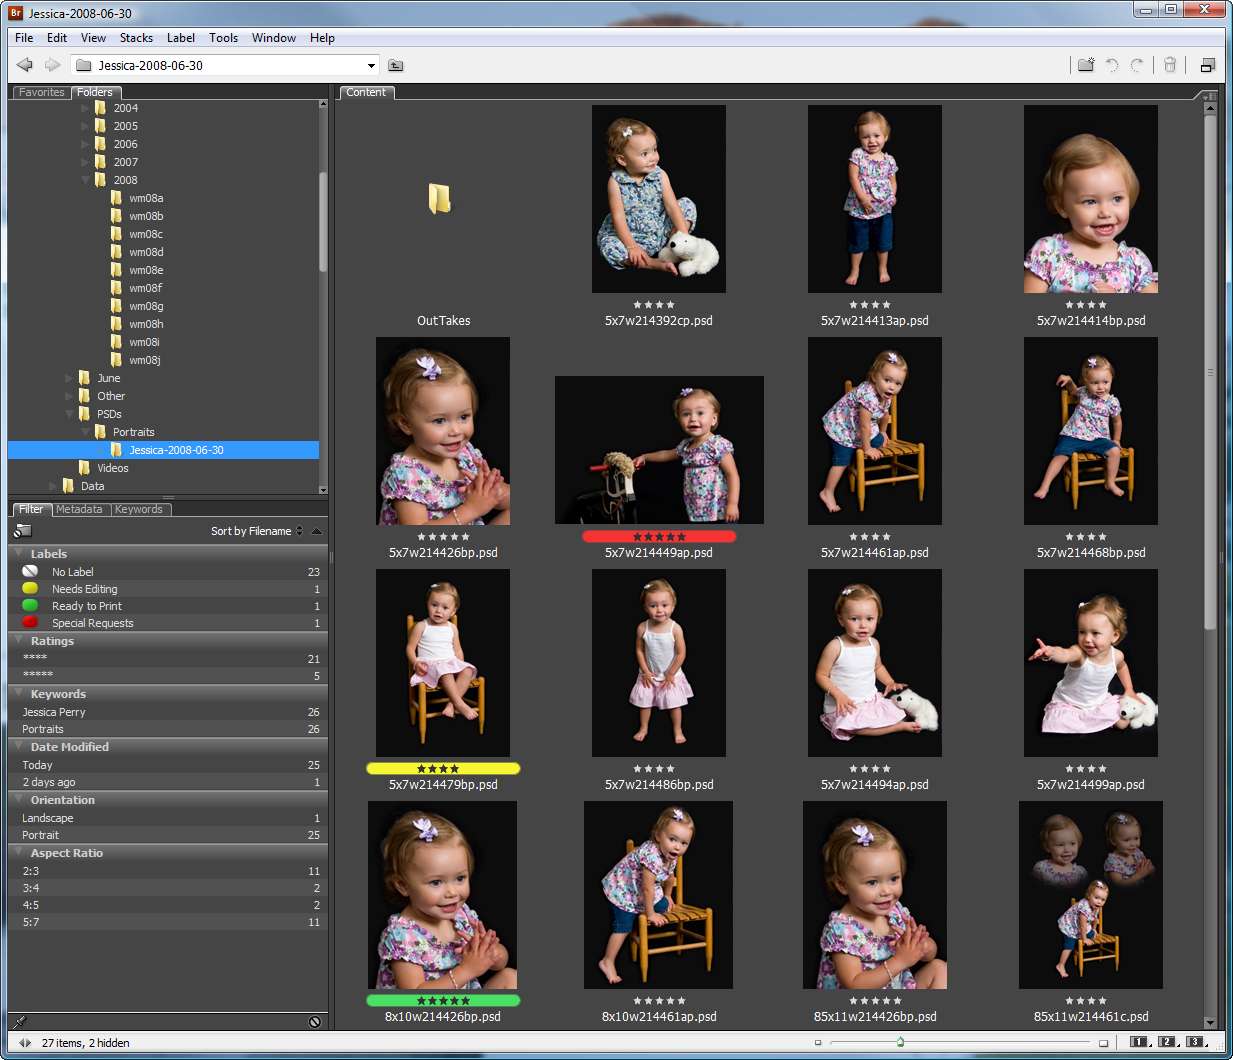
Under the Label menu in Bridge you'll find the short-cut keys to assign star ratings to images. Pretty easy to remember: the Ctrl key plus the star rating you want to assign. Some people like to just use Ctrl and period or comma to adjust the ratings up or down (even an image with no rating can be assigned a four star rating by holding down Ctrl and pressing period 4 times).
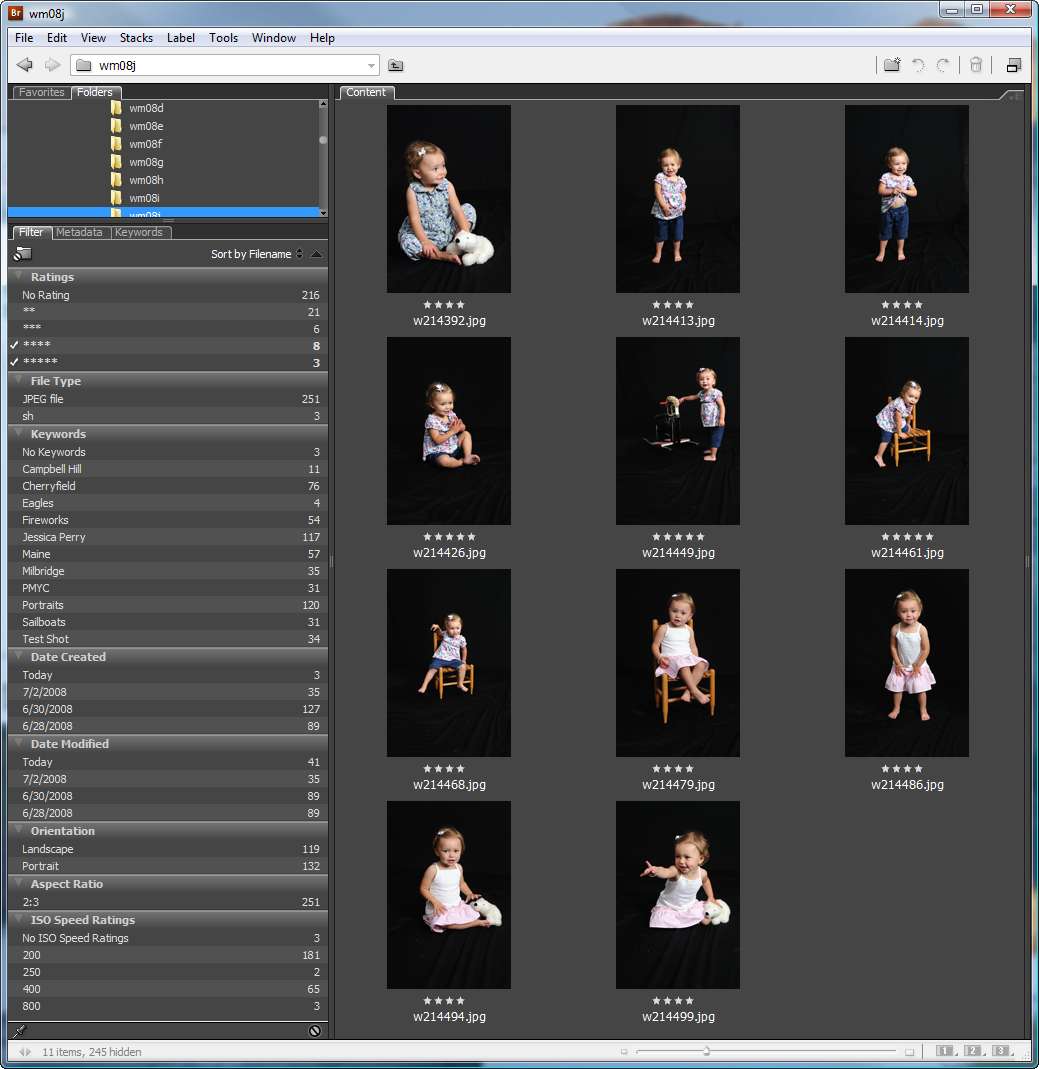
If no images in the folder have star-ratings, the Ratings section doesn't appear at the top of the Filters panel:
But as soon as you start adding star-ratings, the ratings appear under the thumbnails (above the names):
And the Ratings section now appears at the top of Filters panel:
If you click on one of the ratings in the Filters panel, just thumbnails with that rating are shown:
But, if you click on multiple ratings in the Filter panel:
The thumbnails of images with ANY of those ratings appear:
One of the nice things about star-ratings as applied to JPGs is that they also appear when you view a folder with Windows Explorer in the details mode. And as you can see here Keyword tags are also displayed by Explorer and can be searched by various serach tools:
Here you see the results of sorting by Rating, just click on the column heading in Explorer:
On the Label Menu (above) you may have noticed we can also assign labels using Bridge. To make them useful, you need to assign labels that make sense to you, given the way you use Photoshop and Bridge. Under Edit / Preferences / Labels you'll find the menu:
Edit the labels, changing them to things that might be useful to you:
Now in addition to the star-ratings you'll see colors under any labelled images:
And the Filter Menu now allows you to choose just images with particular labels:
One last thing, instead of applying ratings and labels with Ctrl plus a number from 0 to 9, in Preferences / Labels, you can turn off requirement to use Ctrl and rate/label with just the number keys:
Bottom Line: I still prefer the full-screen mode and compare images features of FastStone when it comes to picking (tagging) images. I usually don't need multi-level ratings when I'm picking my own images. And although it seems star-ratings would be useful to rate images from a portrait shoot, I find the multi-pass process described above works better. Since I now work in Bridge when editing my PSD files, I do find the labels are a useful way to keep track of images I need to work on or print.
Suggested next choices: