
(This is one of many pages of tips on Organizing Your Images.)
|
On an earlier page we discussed the importance and ease of adding keywords to every image before anything else. The truth I've never used keywords until I started writing about Organizing Your Images. For ten years I've stored my original images chronologically and I've organized my Subject Folders by year and have never had trouble finding an image (well almost never). However, I do believe in the value of keywords, and I'm going to try adding them to every image I download in the future. Even with keywords, I still think Subject Folders are a great way to organize your better images: the ones you might want to show someone else. For years I've been using different processes to select the good images and COPY them to a Subject Folder (for the last couple it's been FastStone tagging). I'll typically create a Subject Folder for each shoot:
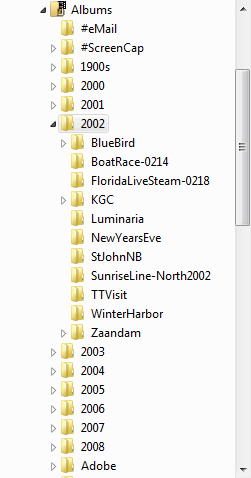
As I said, my Subject Folders have been organized by year as you see in the folder structure below on the left. As the list of years got too long, I made the older ones (mostly with scanned images) sub-folders of the 1900s folder. In most years I've have dozens of sub-folders; I've expanded 2002 just because there only a few sub-folders that year. Organizing by year doesn't work for everyone. I can usually remember within a year when I took _____, so it's worked for me. My recommendation is to definitely use Subject Folders, but find an organization structure that works for you based on the kind of shooting you do. I said on another page that it's easy to reorganize your subject folders later. You can even change any naming conventions you use for the Subject Folders (unlike your naming conventions for original images which you should change as infrequently as possible ... I used one convention for my originals from 1996-2000 and have been using my current one ever since). |
Sponsored Advertisements:
|
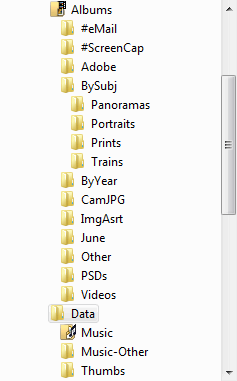
Unlike usual, where it's do as I say, not as I do, I decided to follow my own advice and have started to reorganize my own subject folders. In the right hand column you'll see the new top level of my Albums (Pictures) folder.
 |

|
It's important not to have too many folders at levels that have sub-folders; otherwise, you have to scroll-down, pick a folder, scroll-down, pick a folder, scroll-down, pick a folder and scroll-down. I don't mind scrolling down through a long list of names looking for the one I want, but I don't want to have to do it over and over. It's also important to keep the folders you use most frequently at the top so no scrolling is involved, even in dialog boxes that only have room to list a few names without scrolling. You'll notice that I put pound signs in front of a couple of key folders (the one where I put compressed images sized for eMailing and the ones where my screen captures typically go). By starting the names of my other two critical folders with "By" they sort near the top (the Adobe folder really annoys me, Adobe seems to think they have the right to create their own folder in my tree; if I delete it, they keep putting it back). In addition to the pound sign, you can add underscores to the start of names that are important to you to make the sort to the top (see the example on the bottom of the right-hand column above).
You're not always going to have room for all your images on one hard drive (for example, none of my originals are in this structure). As space runs out on the drive you may want to move whole classes of images to another drive. Backup is another thing to consider when building your folder structure, you may want to backup different classes of images differently. Some of the classes I grouped my images into:
You'll notice that in addition to using short names for upper-level folders, I also avoid putting spaces, quotes, and certain other special characters in my folder names. These characters cause trouble when used in website folder names, and although you may not be putting any images on a website now, you might as well prepare so it's easy in the future. When in comes to the name of the Subject Folder with the actual images, I use longer names; ones which might mean something when I look at them a few years later. Look at the names of the folders in the 2002 folder above, you'll see that instead of spaces I use upper-case characters in the middle of the names (or I'll use hyphens and/or underscores to visually break up the name.
In Rate/Tag Images we saw how to use FastStone to tag images. Now let's see how we COPY the better ones to a Subject Folder. Then in the menu under Tag you can choose to either select or only show tagged images. I choose to "Show Tagged Files Only" so I could review them:
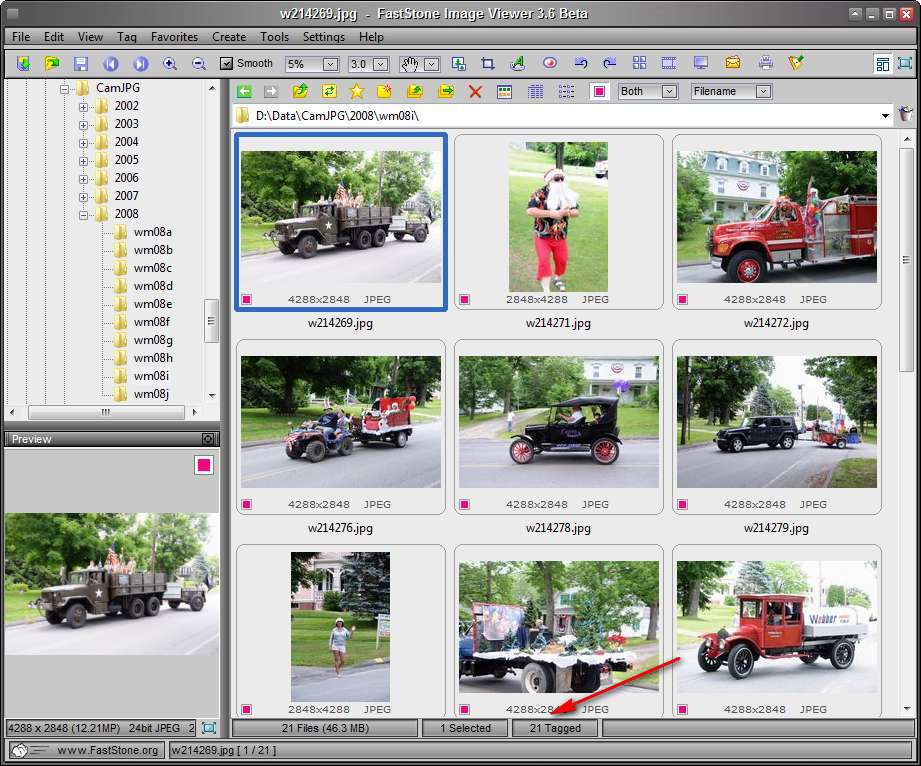
Once I'm happy with the choices, I select all (Ctrl-A) and can then either right-click on an image and get the menu shown below and choose "Copy to Folder...", or I can click on the "Copy to Folder" icon (red arrow below), or hit the letter C.
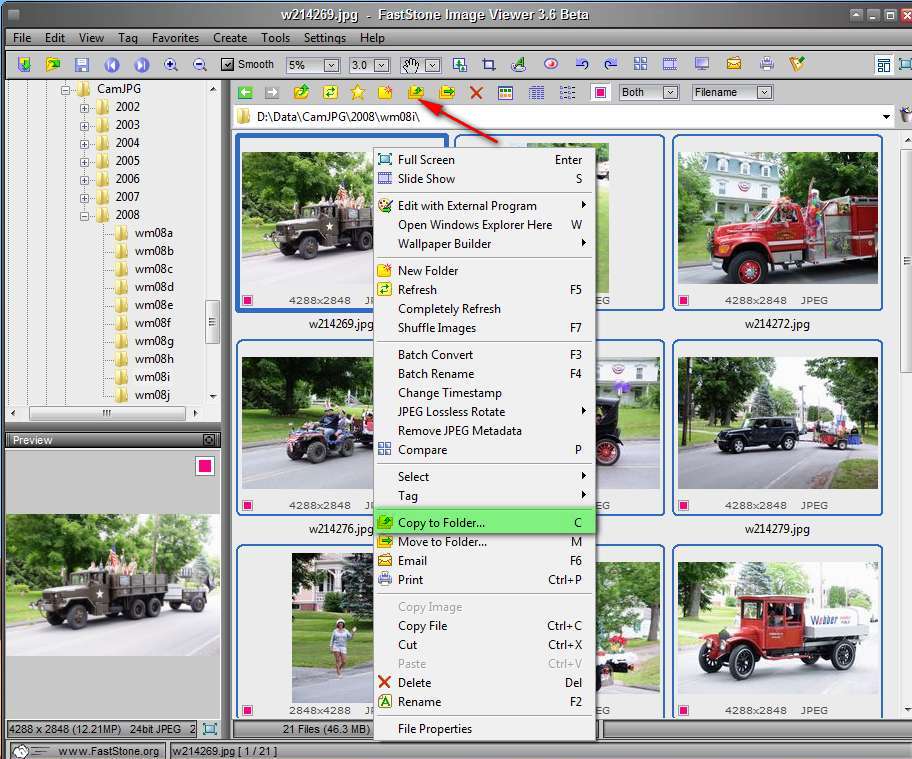
In all cases I'll get this menu:
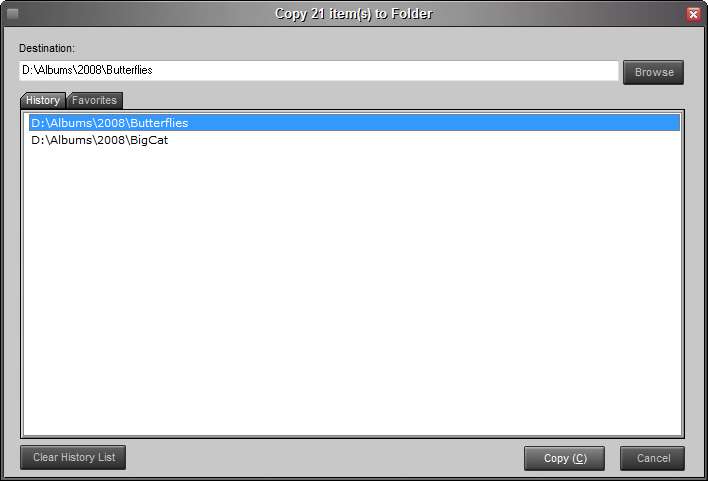
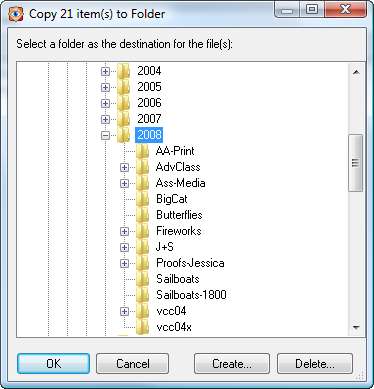
It remembers the last folder I copied files to, which is often useful (you can keep copying individual files to the same folder by typing C twice). However, in this case I need to specify a new folder using the Browse button (top right above). To create a new subject folder, be sure to select the folder you want to put it in. Since mine were organized just by year, I choose 2008 and pressed "Create...":
Like create folder everywhere in Windows, it creates one with the name "New Folder" but highlights it so the next character you type will replace the temporary name. Once you type in the correct name, press "OK".
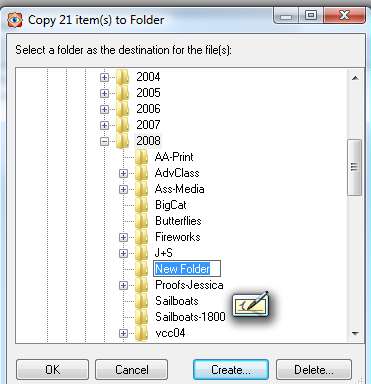
If you press "Enter" instead like I did (see below), you'll see the new name and you can still press "OK":
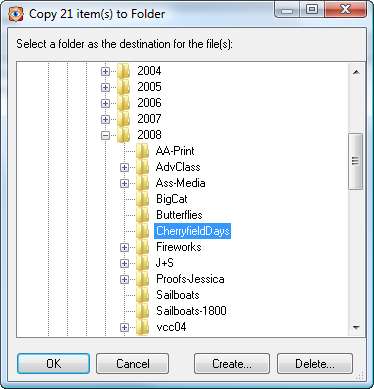
That takes you back to this menu, with the proper folder name filled in:
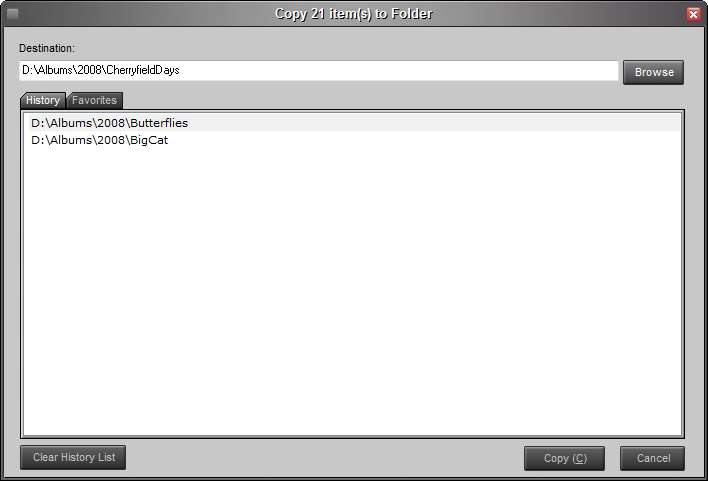
Press the "Copy" button, or type the letter C to complete the copy.
That's all there is to tagging and copying files to a subject folder. It takes less time than it took to read this. And as I said above, there are a lot of advantages to having your good images organized into Subject Folders.
If I had tagged RAW files instead, I could have copied them to a subject folder and worked on them there. Be sure you've defined Photoshop as your external editor (see FastStone: External Editors - coming)
On the previous page (Rate/Tag Images) we saw a technique that works well to simulate a multi-level rating system using the current single-level tags in FastStone. (It works well, because the truth is most of the time one needs several passes to destinguish which are the 3, 4 and 5 star images.) The problem was that images they picked were all Review Copy JPGs, not the RAW files we want to process. Here's the technique I use to get PSD files converted from RAW into the appropriate subject folder:
Usually there aren't that many images, so it's not a problem to select the RAW files manually in Bridge while looking at the selected images in a FastStone window. Check back, I plan to illustrate the process with screen shots.
If I tag RAW images in FastStone, here's another trick I'll use: "Select All Tagged Images" and move to a temporary folder on the same drive (almost instant). Then select all the images in the temporary folder using Bridge and process as described above (using "Save Images" to create PSD files in the Subject Folder). After converting to PSDs, move them back where they belong using Bridge since FastStone doesn't currently move the XMP sidecar files Bridge will have created.
A work in progress ...
Suggested next choices: