ImagingTips.com

FastStone Control Bar

by Joe Holler
(Updated 5/11/2009)

The Control Bar is located in two places:

  1. Near the top of the screen in the Browser (Thumbnail) View:
    Control Bar
  2. At the bottom left of the screen in the Full Screen View (move the cursor to the bottom left and it will appear):
    Control Bar

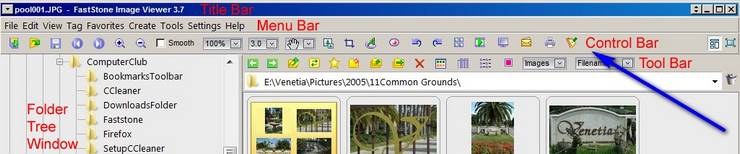
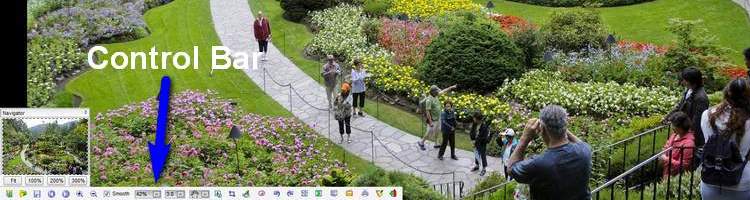
It looks like this (click on any button below to jump to it's description):

Download PhotosOpenSavePrevious and Next ImageZoom In and OutSmoothImage Zoom RatioMagnifier Zoom RatioPan/SelectResize/ResampleCrop BoardDraw BoardRed-Eye RemovalRotate Left and SaveCompare Selected ImagesSlideshowScreen CaptureEmail Selected ImagesPrint Selected ImagesSettings
Click on any Control Bar Button above to jump to its description.


Download Photos     Download Photos

The Download Photos button is used to transfer photos from your memory card to the appropriate folder on your hard drive. FastStone allows you to rename the photos at the same time and can automatically skip images you already downloaded, but forgot to delete from your memory card. For more information, click here.


open     Open

The Open function allows you to open a file, not necessarily from the current folder. If you are in the browser view, it will be selected in the browser view If you are in full screen view it will open into full screen view. For more information, click here.


open     Save

The Save function allows you to save a file, not necessarily into the current folder. For more information, click here.


Previous and Next     Previous and Next

In the browser view, the "Previous" button Previous will select the previous file, and the "Next" button Next will select the next file. In windowed and full screeen views the previous or next file will be opened.


Zoom    Zoom In and Out

In the preview window, windowed view and full screen view, the "Zoom In" button Zoom In will make the image appear larger and the "Zoom Out" button Aoom Out will make the image appear smaller.


Smooth     Smooth

In the preview window, windowed view and full screen view, checking the "Smooth" checkbox Smooth will make the image better but makes rendering the image slower. If the files are very large, or the computer very slow, the speed of rendering may be an issue, but generally it isn't.


Zoom Ratio     Image Zoom Ratio

In the preview window, windowed view and full screen view, there are several ways to select a zoom ratio:

  1. Click on the "Image Zoom Ratio" drop down menu and click on a percentage.
    Image Zoom Ratio
  2. Hold the control key down and rotate the mouse wheel.
  3. Hit the + and - keys.
  4. Hit 1,2,3,...,0 to zoom in 100% to 1000% repectively.

Magnifier Zoom Ratio     Magnifier Zoom Ratio

In the preview window, windowed view and full screen view, a magnifying glass is available to zoom in on specific parts of an image. Just click on the image to magnify it. Hold the left mouse button down and move the cursor around the image (pan) to magnify other parts of the image. The "Magnifier Zoom Ratio" drop down menu allows you to specify how much magnification the magnifying glass uses. Click on the drop don menu and click on a ratio.

Magnifier Zoom Ratio

pan     Pan/Select

In the preview window, windowed view and full screen view, part of an image can be select by several methods. A rectangular selection can be made and then moved around using the pan feature. For more information click here.


Resize/Resample     Resize/Resample

It is sometimes advantageous to reduce the size of an image file. For example, to prepare it to be sent in an email or put into a website. It might be advantageous to increase the size of an image file in order to make a large print, however, increasing the size of the file may not improve the print. The Resize/Resample function is used for this purpose. For more information click here.


Sponsored Advertisements:

Sponsored Advertisements:

Sponsored Advertisements:

Crop Board     Crop Board

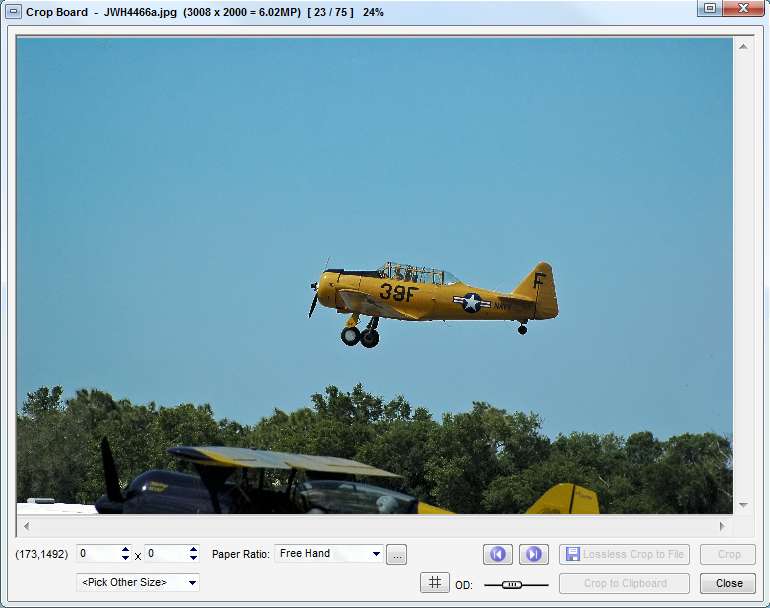
To cut out a rectanglular area of the image use the Crop Board.

For more information click here.

Crop Board


Draw Board     Draw Board

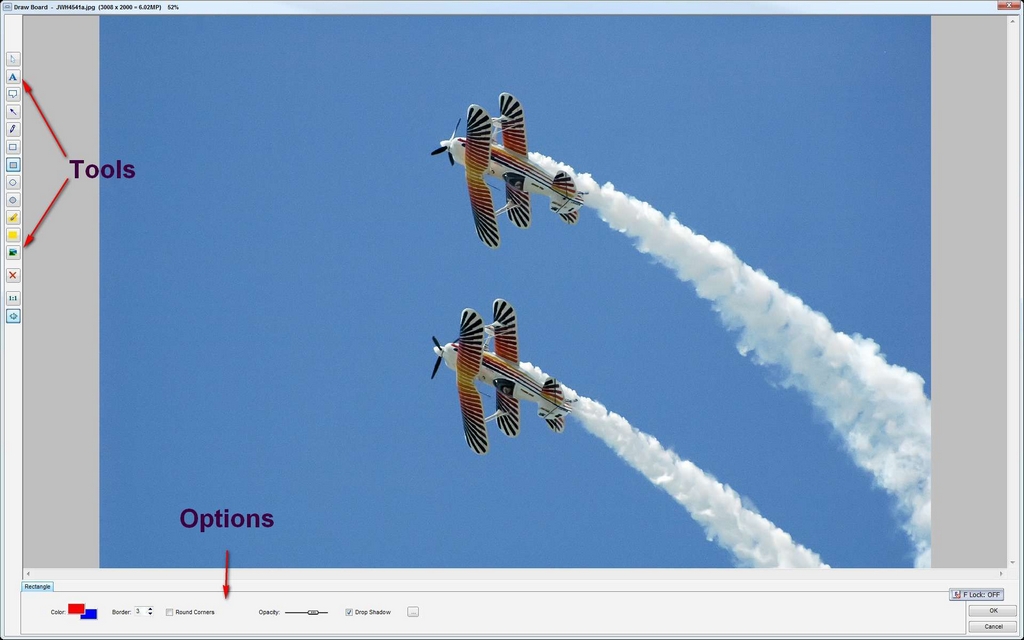
To annotate an image by adding text, arrows, thought/speech bubbles, etc. use the Draw Board.

For more information click here.

Draw Board


Draw Board     Red-Eye Removal

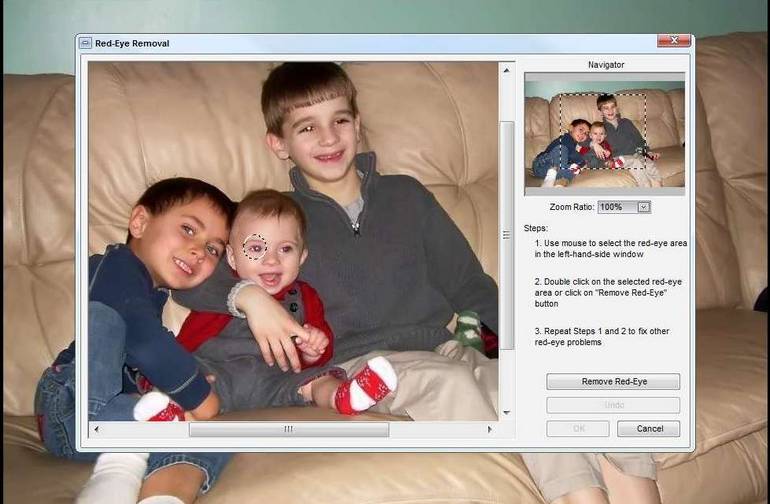
Click on the center of the eye and drag outward to select the red area. It doesn't matter if the selection is a little bigger than the eyeball, but be sure all the red is selected. Once the circle is drawn it can be repositioned by clicking and dragging. Double click on the selected area or click Remove Red-Eye button. Scroll mouse wheel to zoom in or out, or use the Ctrl+ the Plus or Minus key. Click right mouse button and drag to pan, or use the scroll bars.

Red-Eye


Rotate     Rotate

In the browser view, select an image or images and click on the appropriate rotate button to rotate the image 90 degrees clockwise or counter clockwise. In windowed or full screen view, just click the appropriate button.


Compare Selected Images    Compare Selected Images

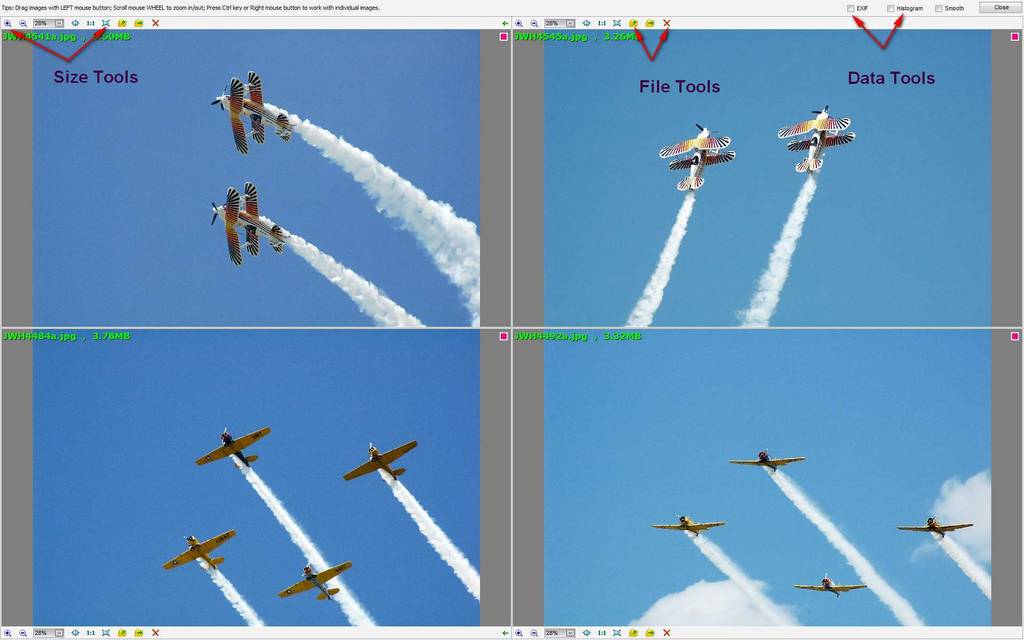
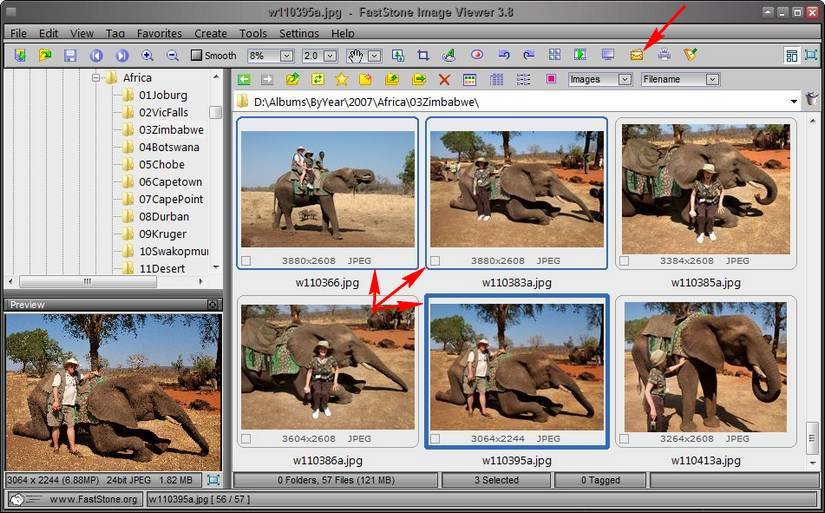
It is easier to compare images when they can be seen side by side. Select two to four images and click the "Compare Selected Images" button. For more information click here.

Compare Board


Slideshow    Slideshow

To make a quick and easy slideshow, complete with music and trasitions, select a folder containing images and or subfolders of images then click the "Slideshow" button and he slideshow dialog window will open. However, the slideshow can not be saved. For more information click here.

Slideshow


    Screen Capture

For more information click here.

Email Selected Images    Email Selected Images

To Email resized and compressed images, select them and click on the Email icon Email Selected Images.

For more information click here.

Screen Shot


Print Selected Images    Print Selected Images

Check Back Later


Settings    Settings

Click for details on FastStone Settings


Suggested next choices:

ImagingTips.com Site Map
Copyright Joe Holler, 2009
2724